


The kitchen project is officially complete! It was something I was looking forward to doing since the day we signed on the dotted line for this house. I knew it was going to be a bit of an undertaking, but was excited to be able to design the space and do a lot of the work to get it looking how we wanted it! My mom was a giant help in the actual labor of the project – guiding us in how to hang tile and taking on the task of painting the cabinets, among other things. It was definitely a group effort! We were able to get it done in about 2 and a half days. Granted, they were 12+ hour work days, but it was completed before she had to fly back home, which was her goal!
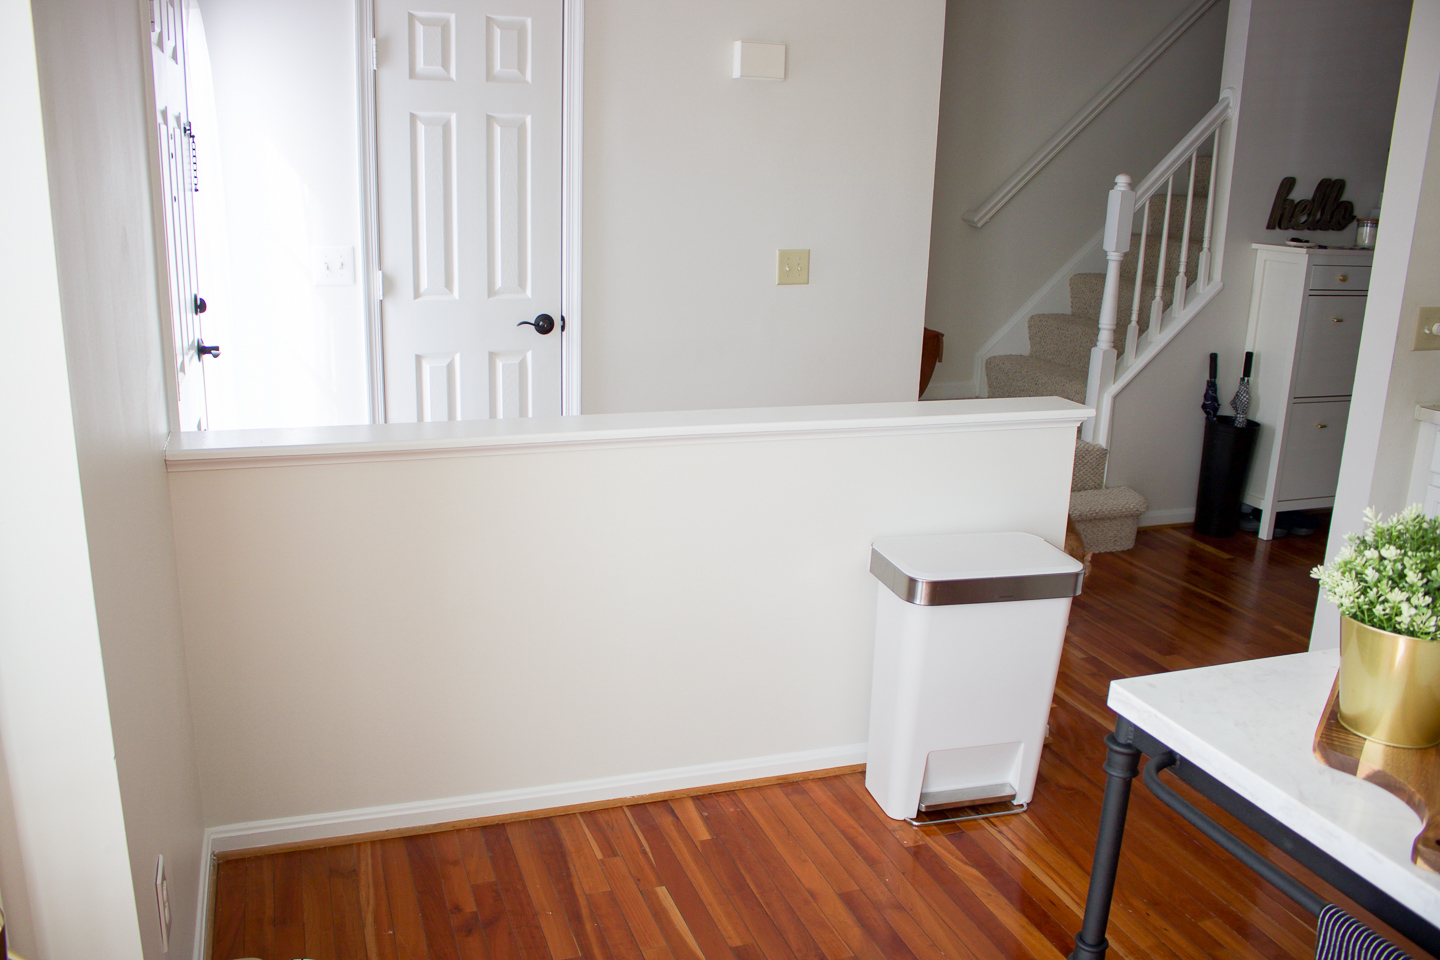
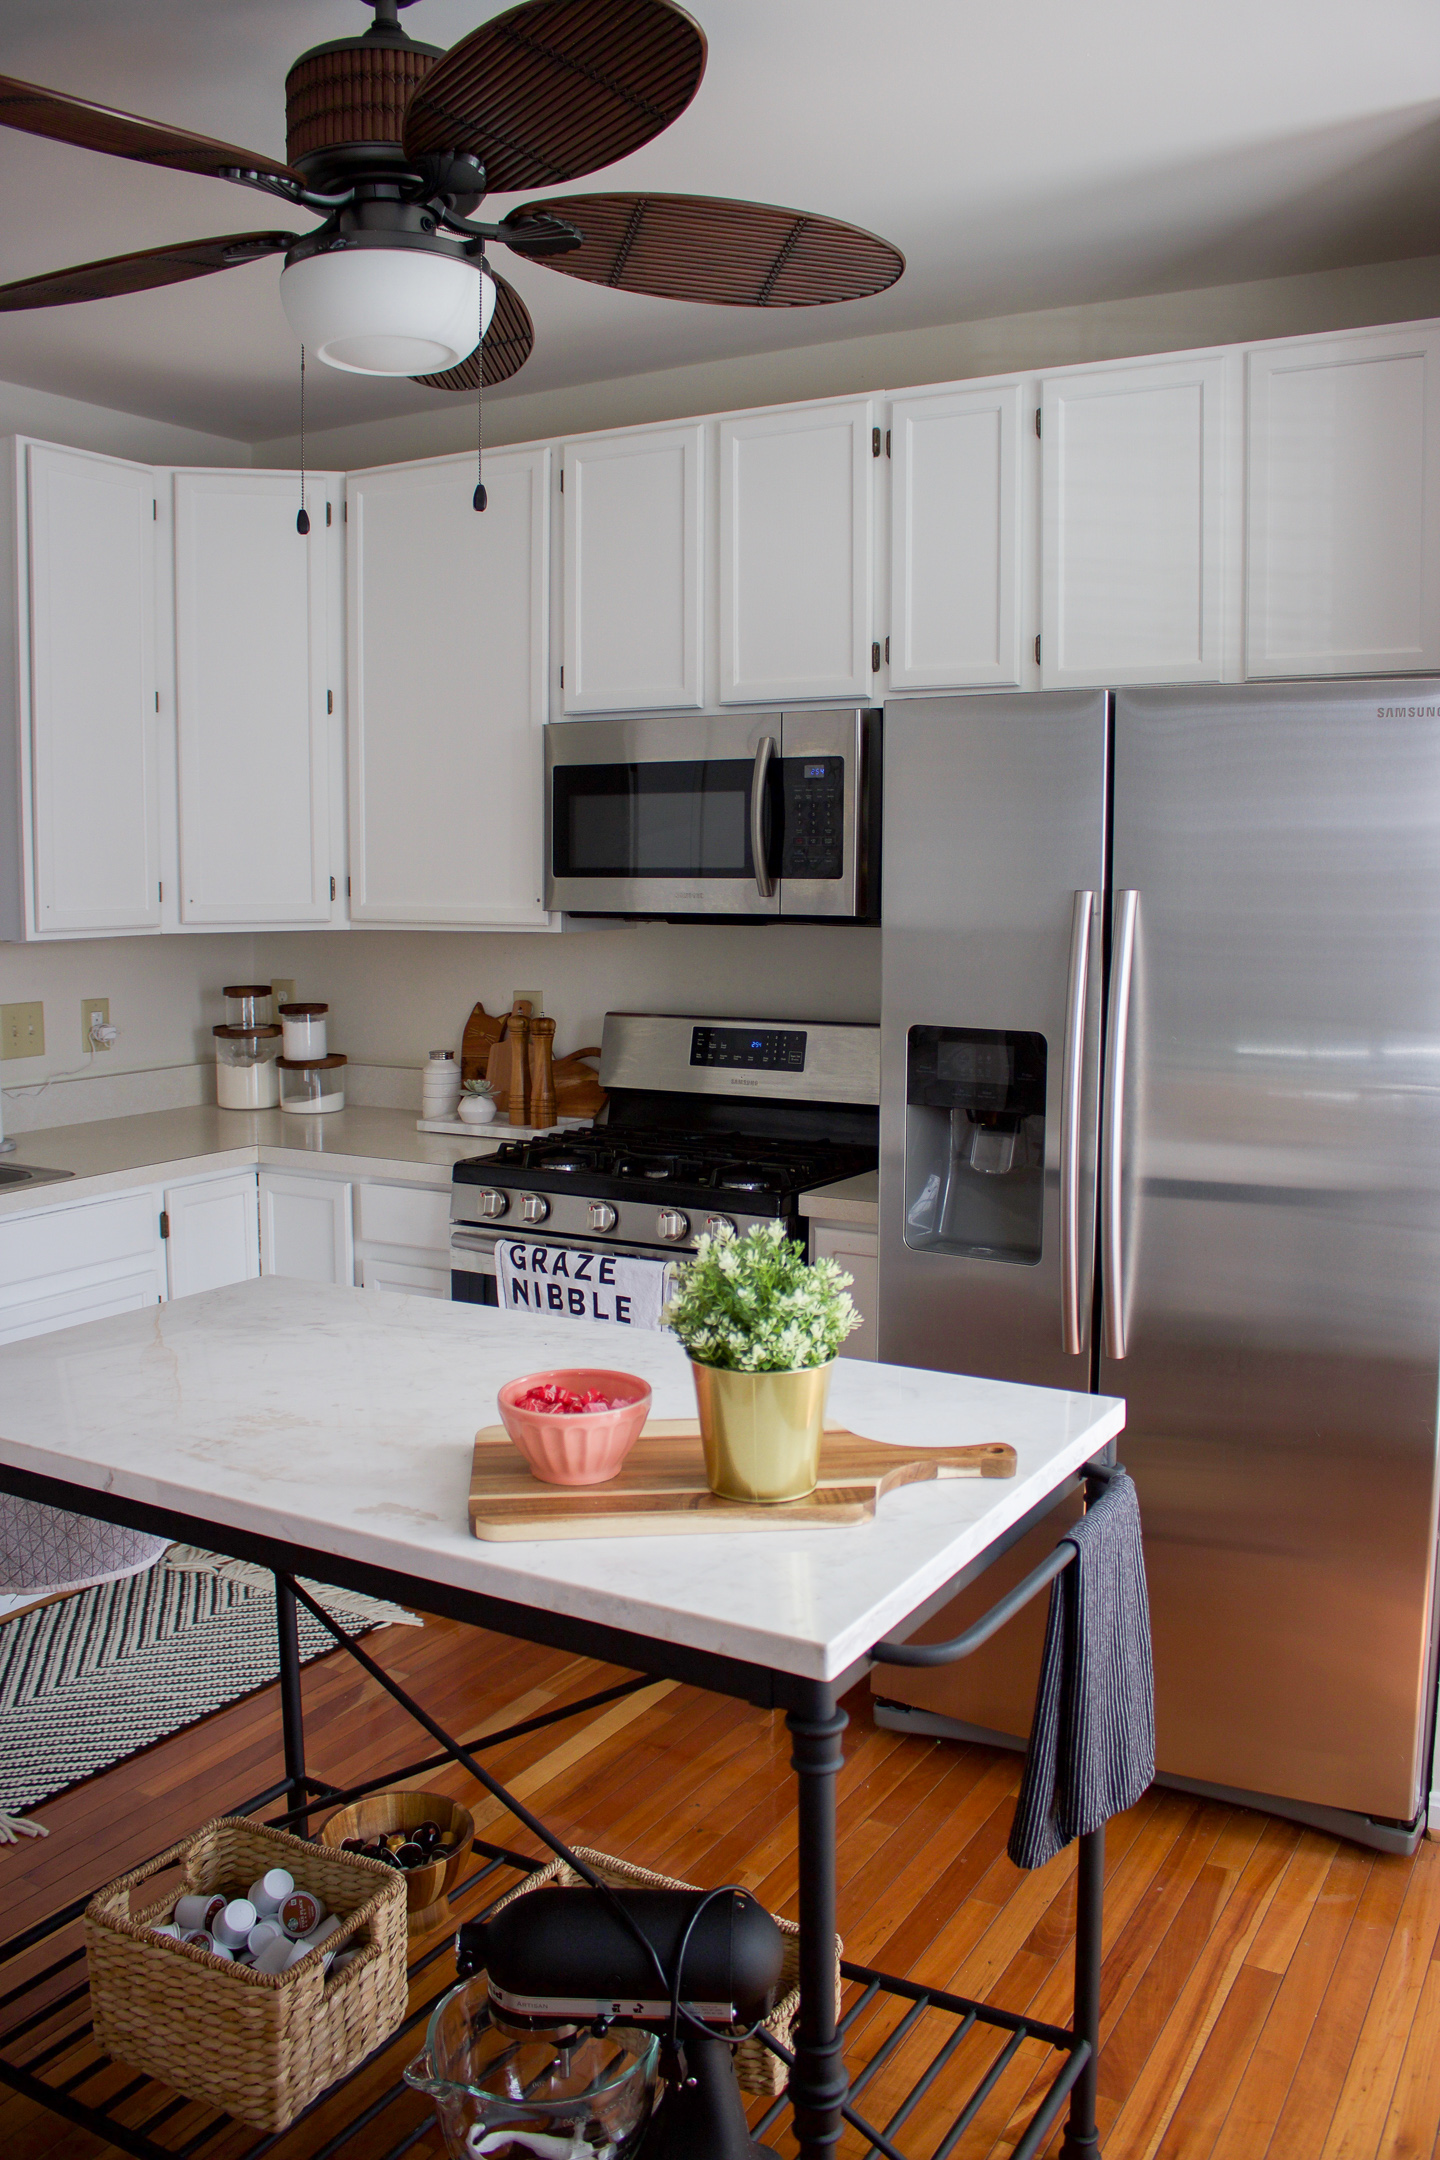
Here’s a look at the kitchen before:
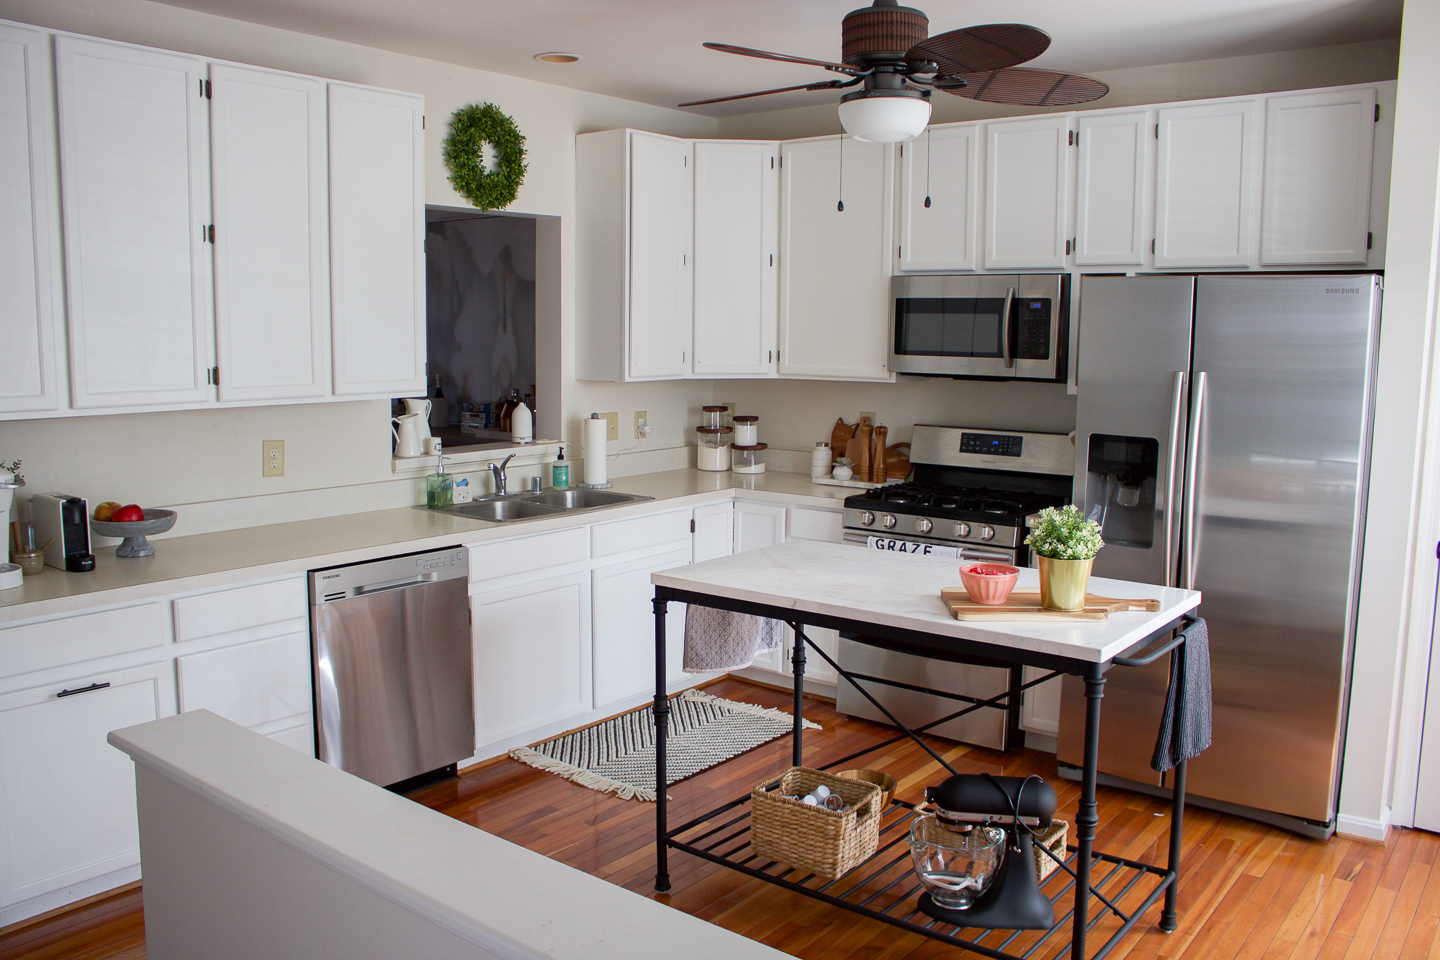
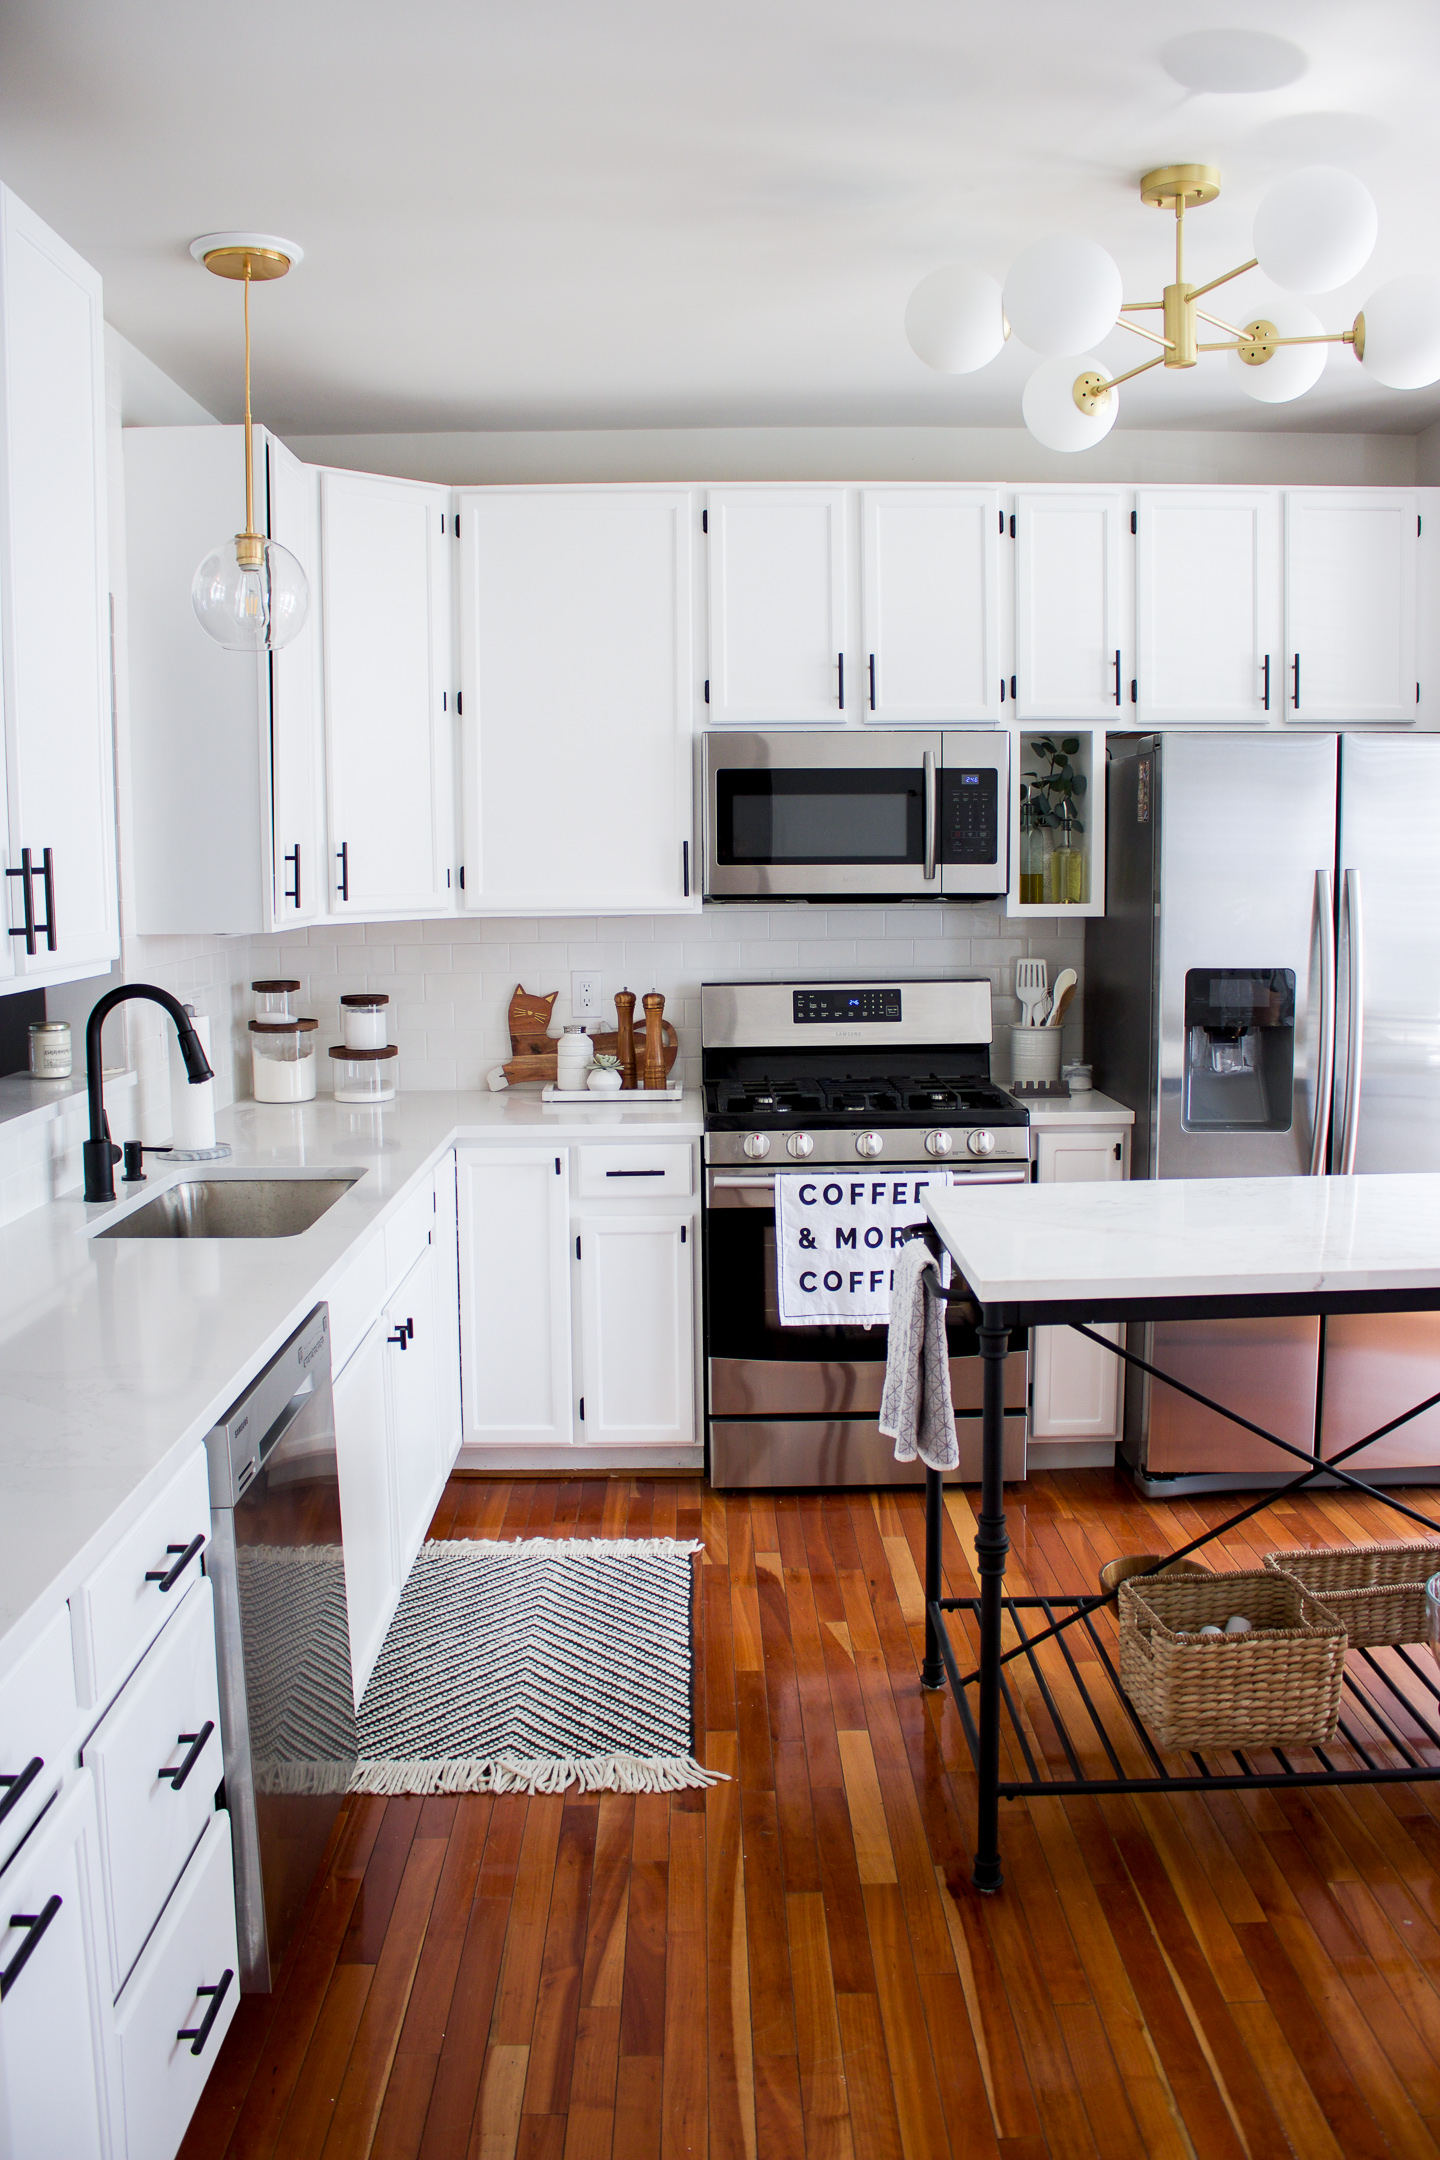
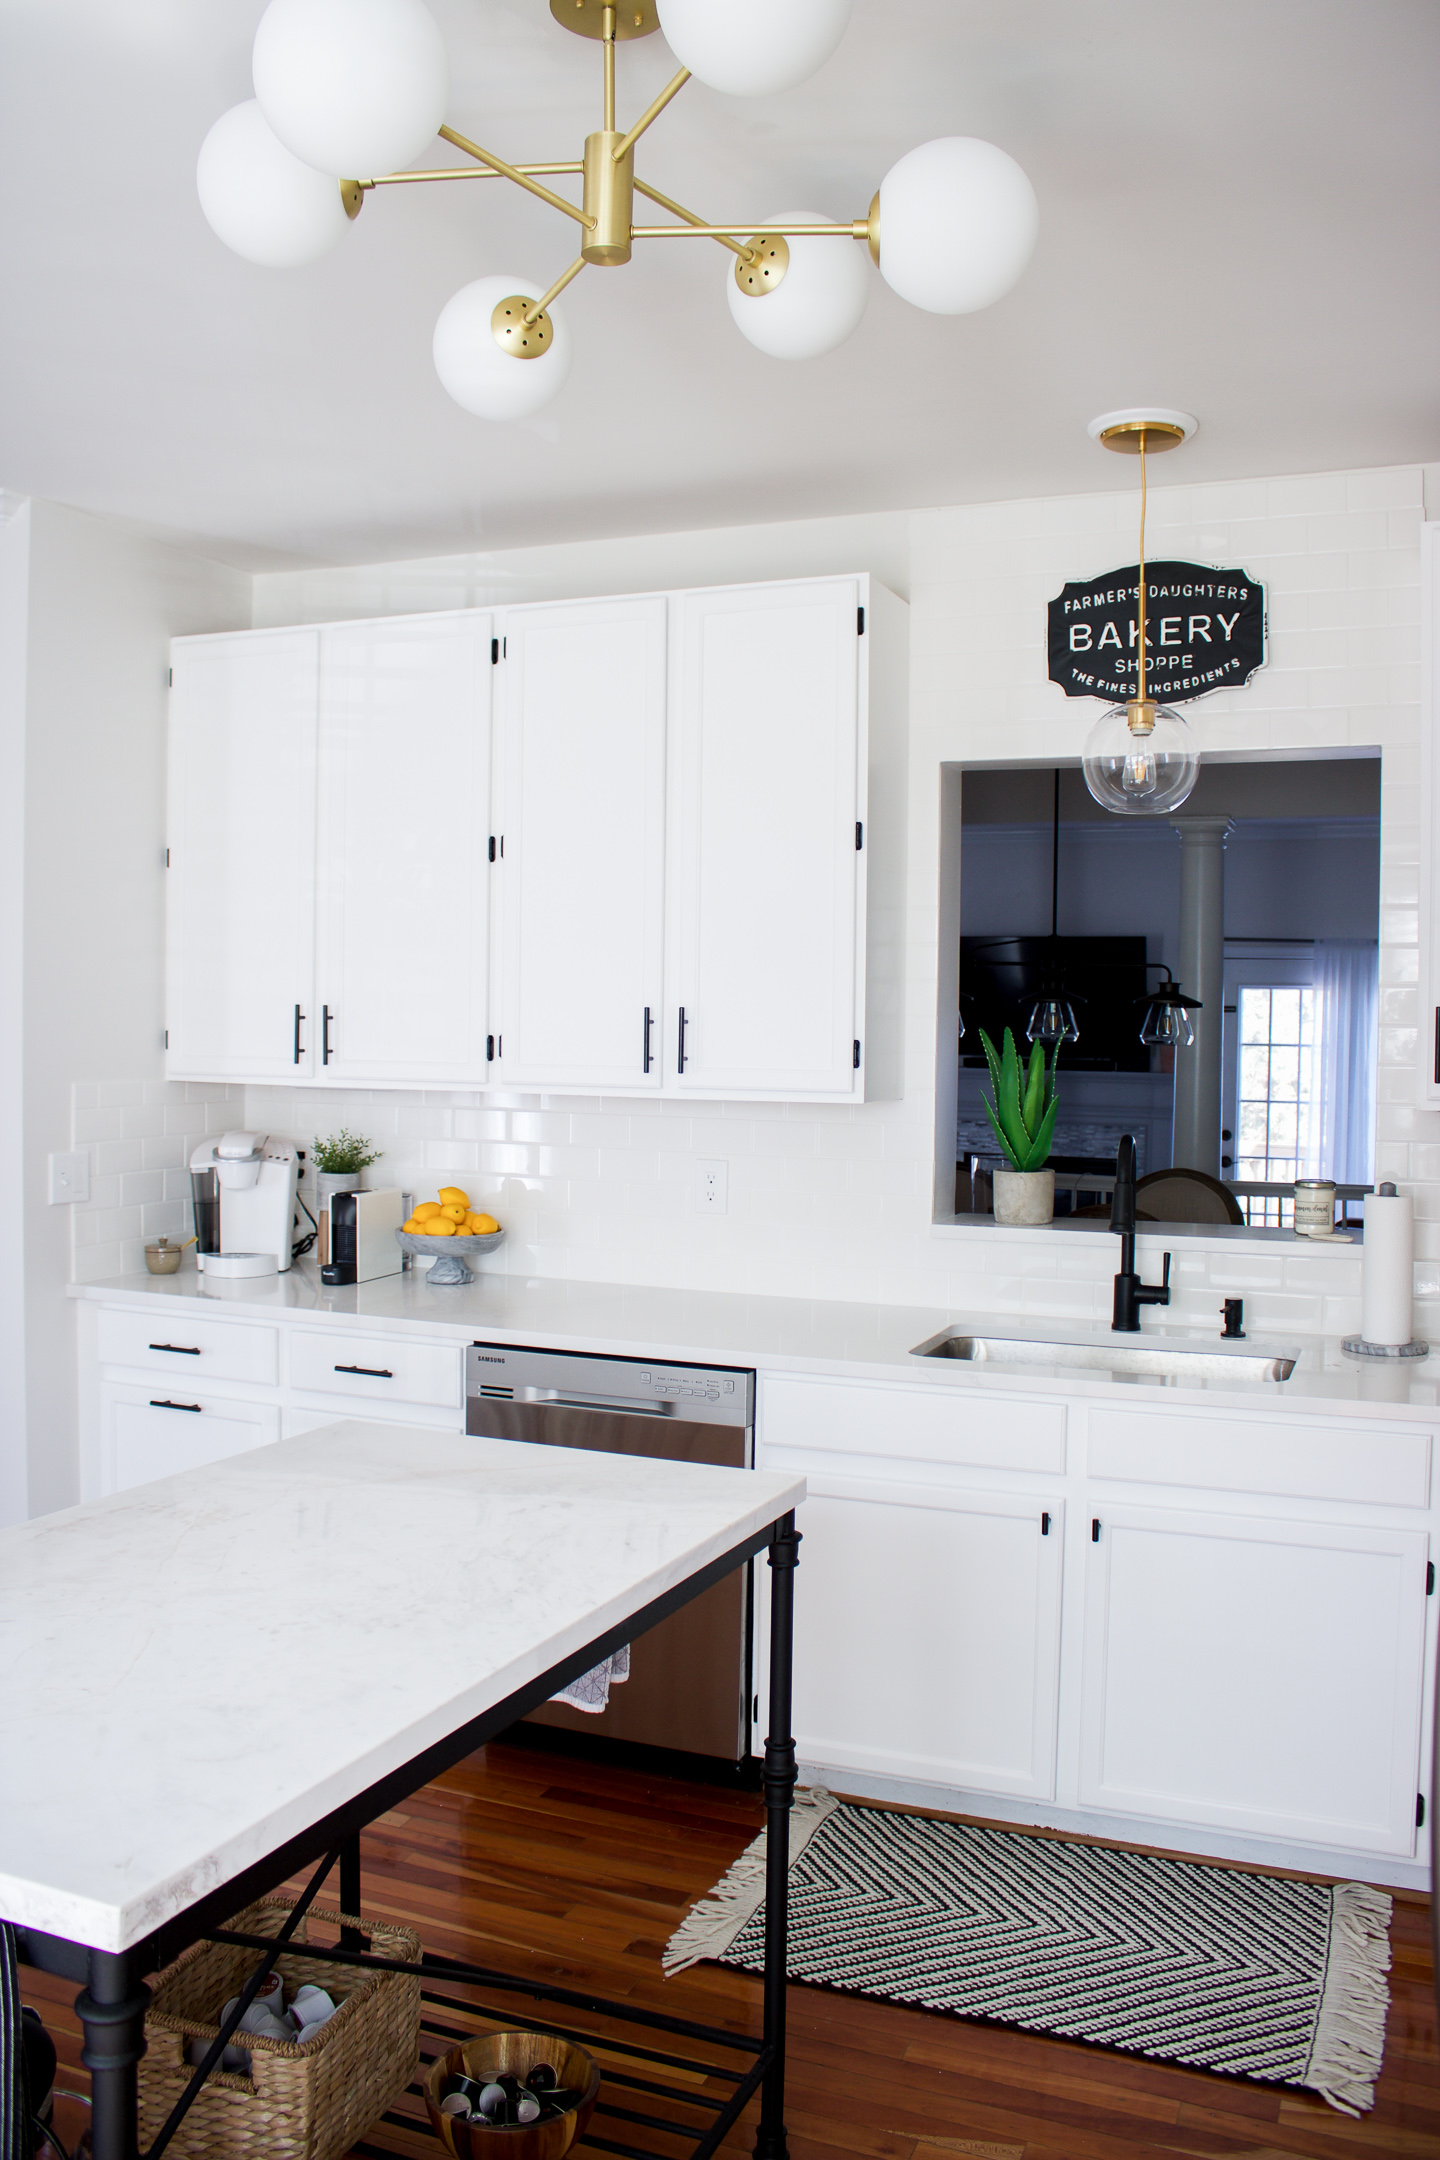
And here’s what it looks like now:

It’s even better than I pictured in my head! I love how light and bright the space is. Since you walk into our house and the kitchen is the first thing that you see, I wanted to make an impact with the space – something clean and airy and welcoming. I feel like we accomplished that!
I thought it would be fun to record some footage before, during and after the project was complete!
Here’s what we did:
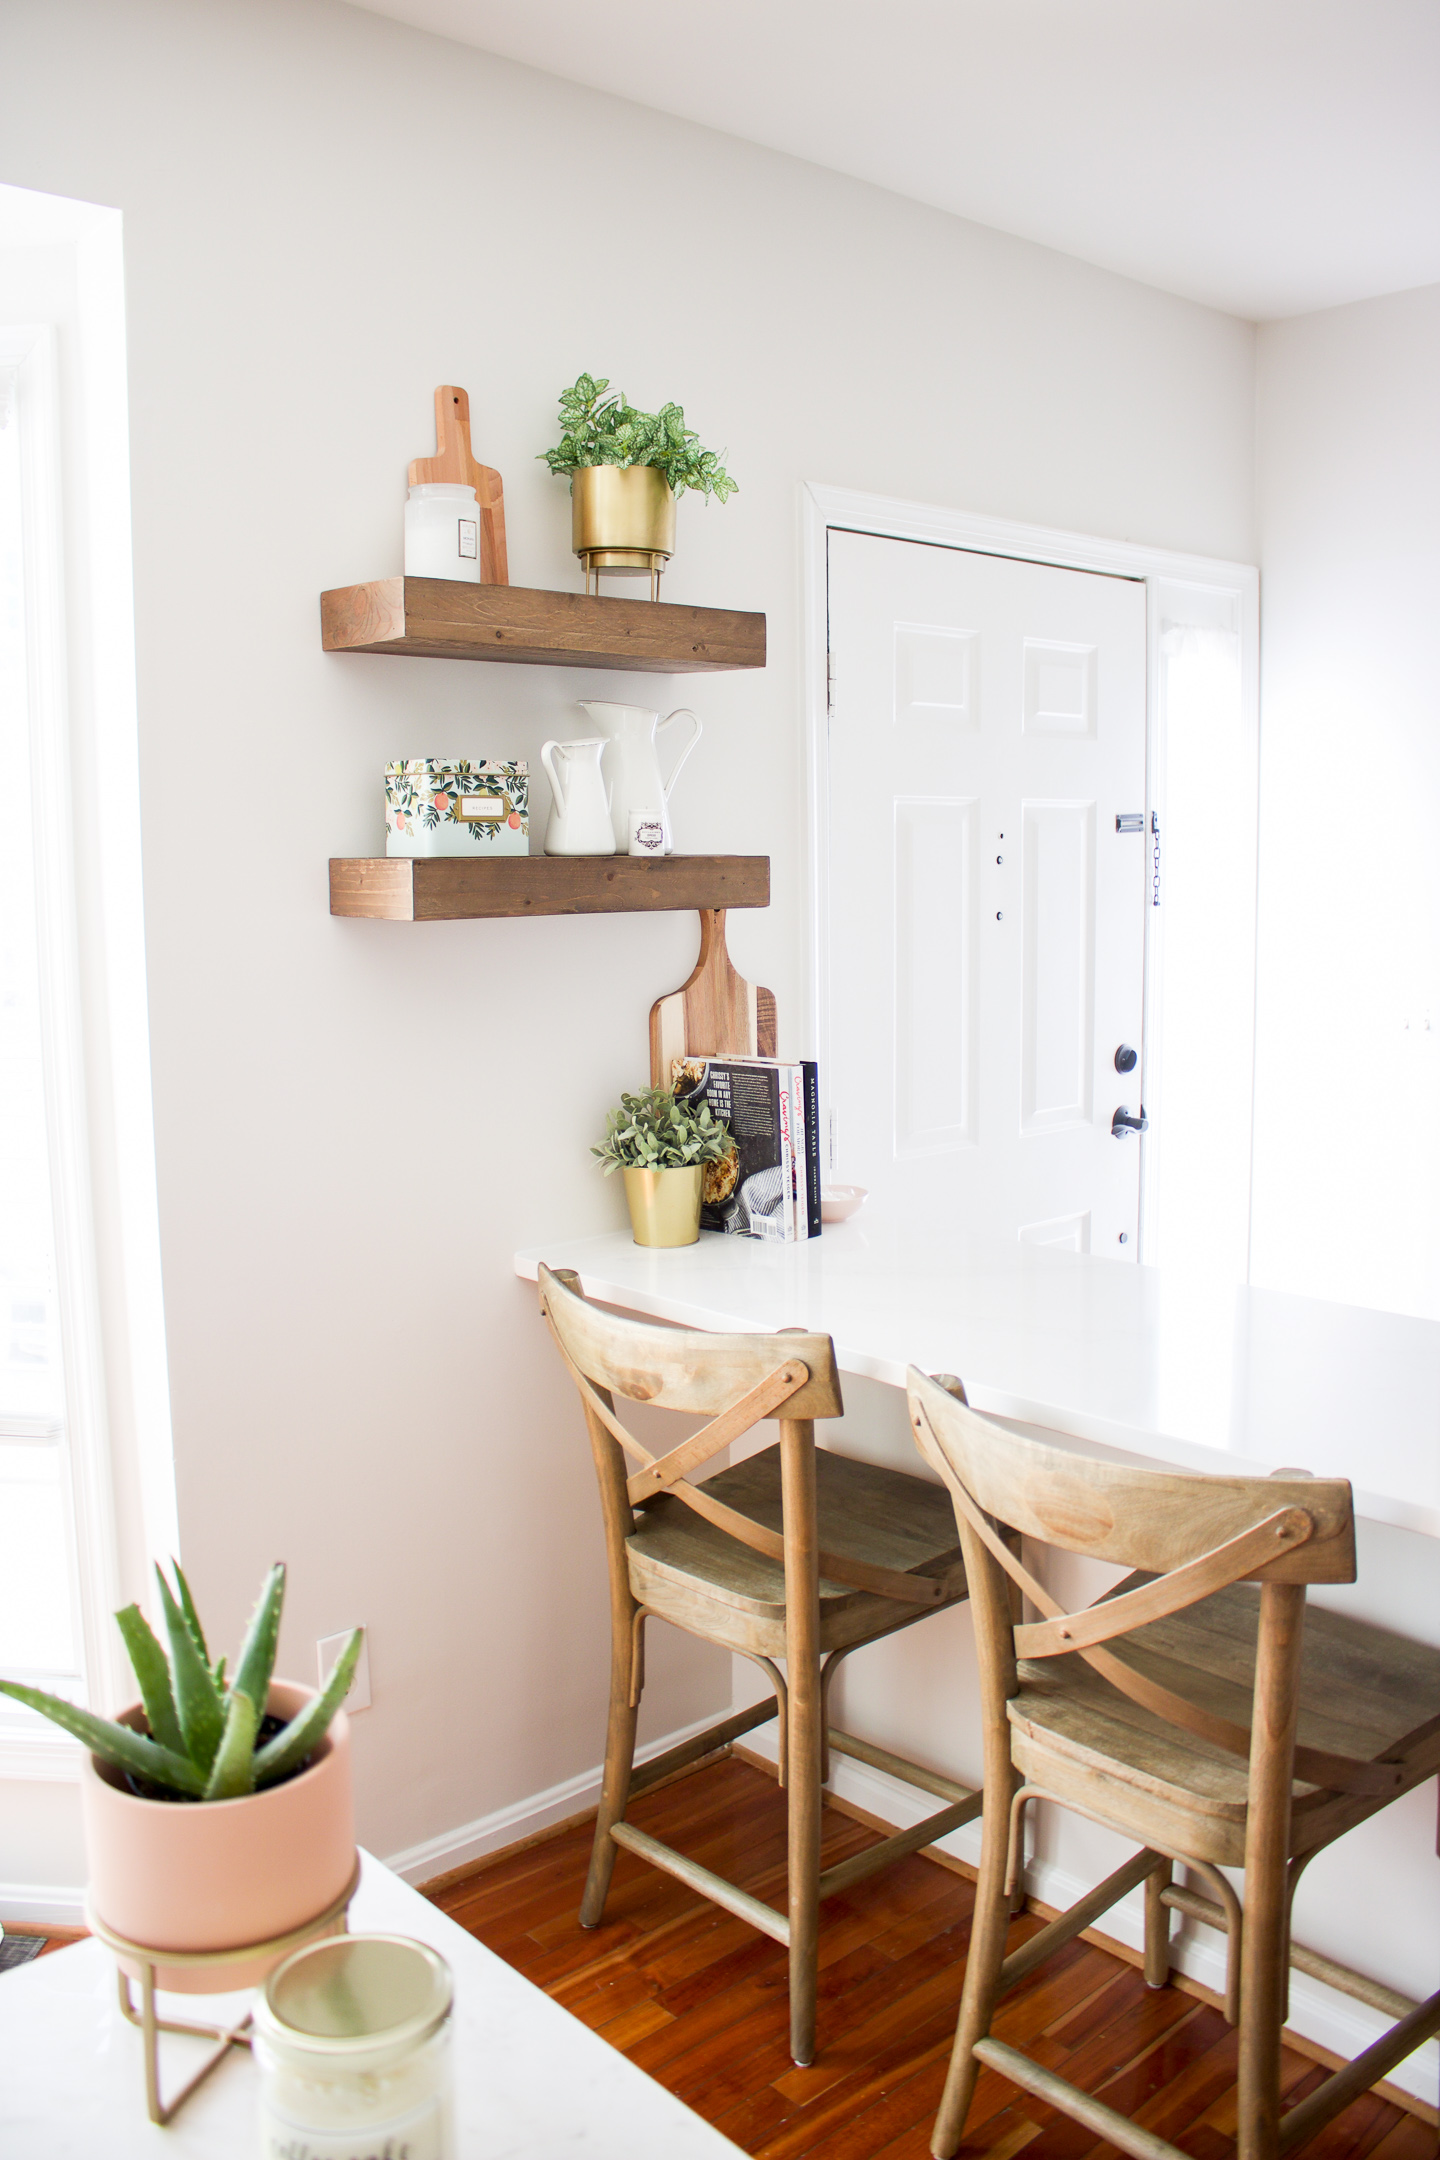
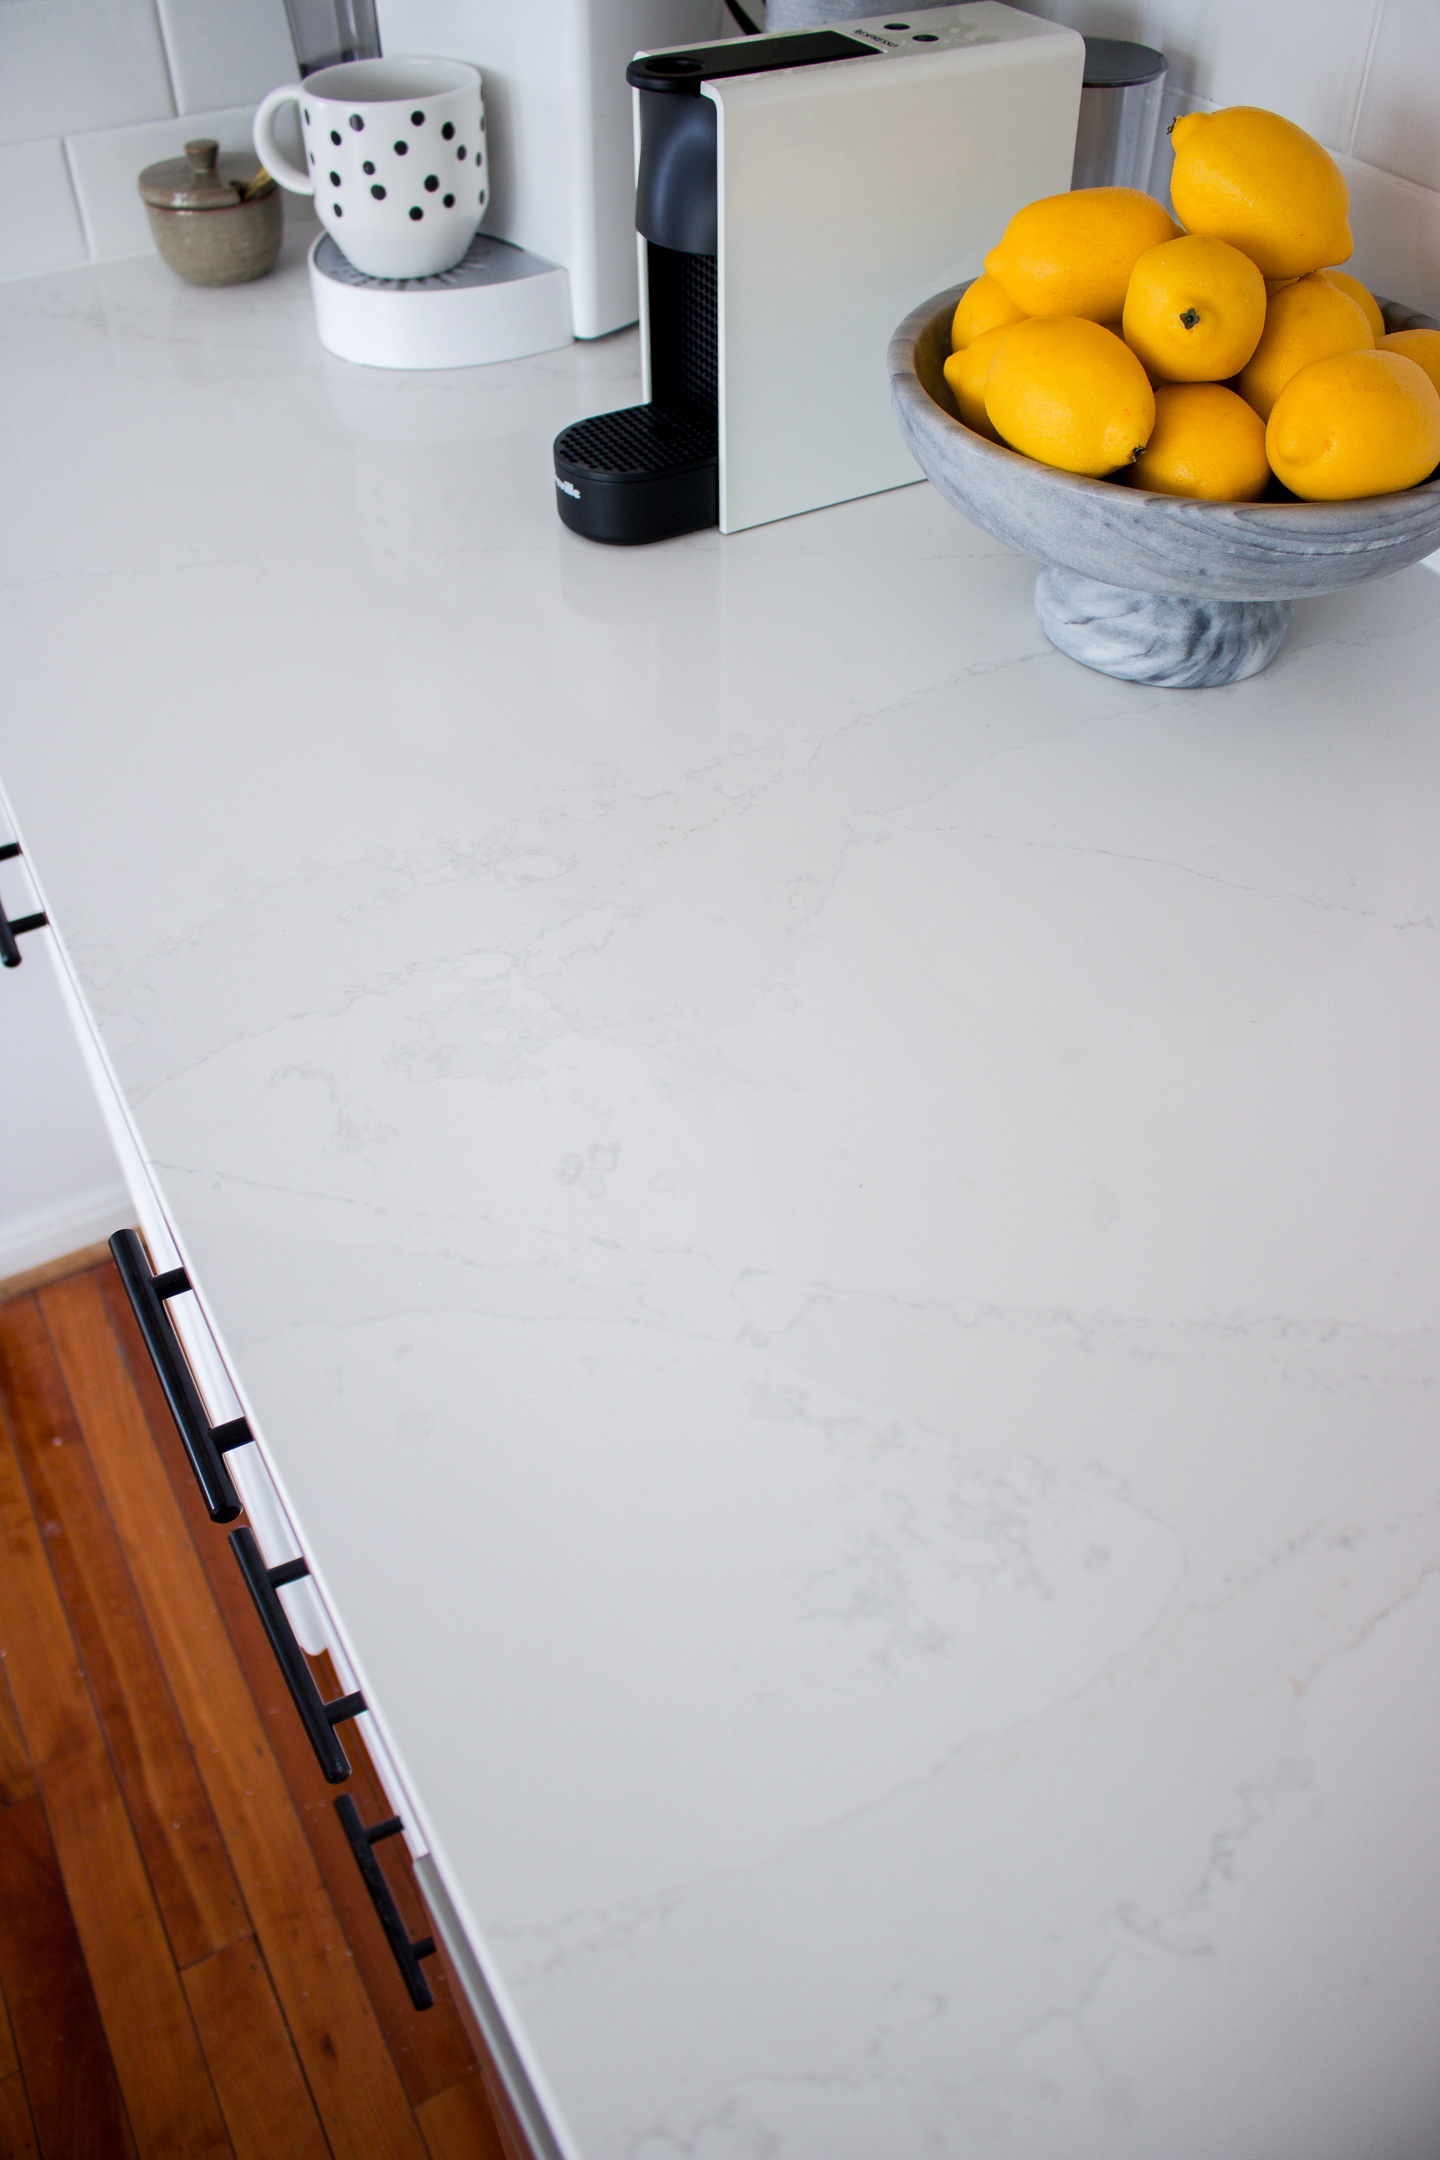
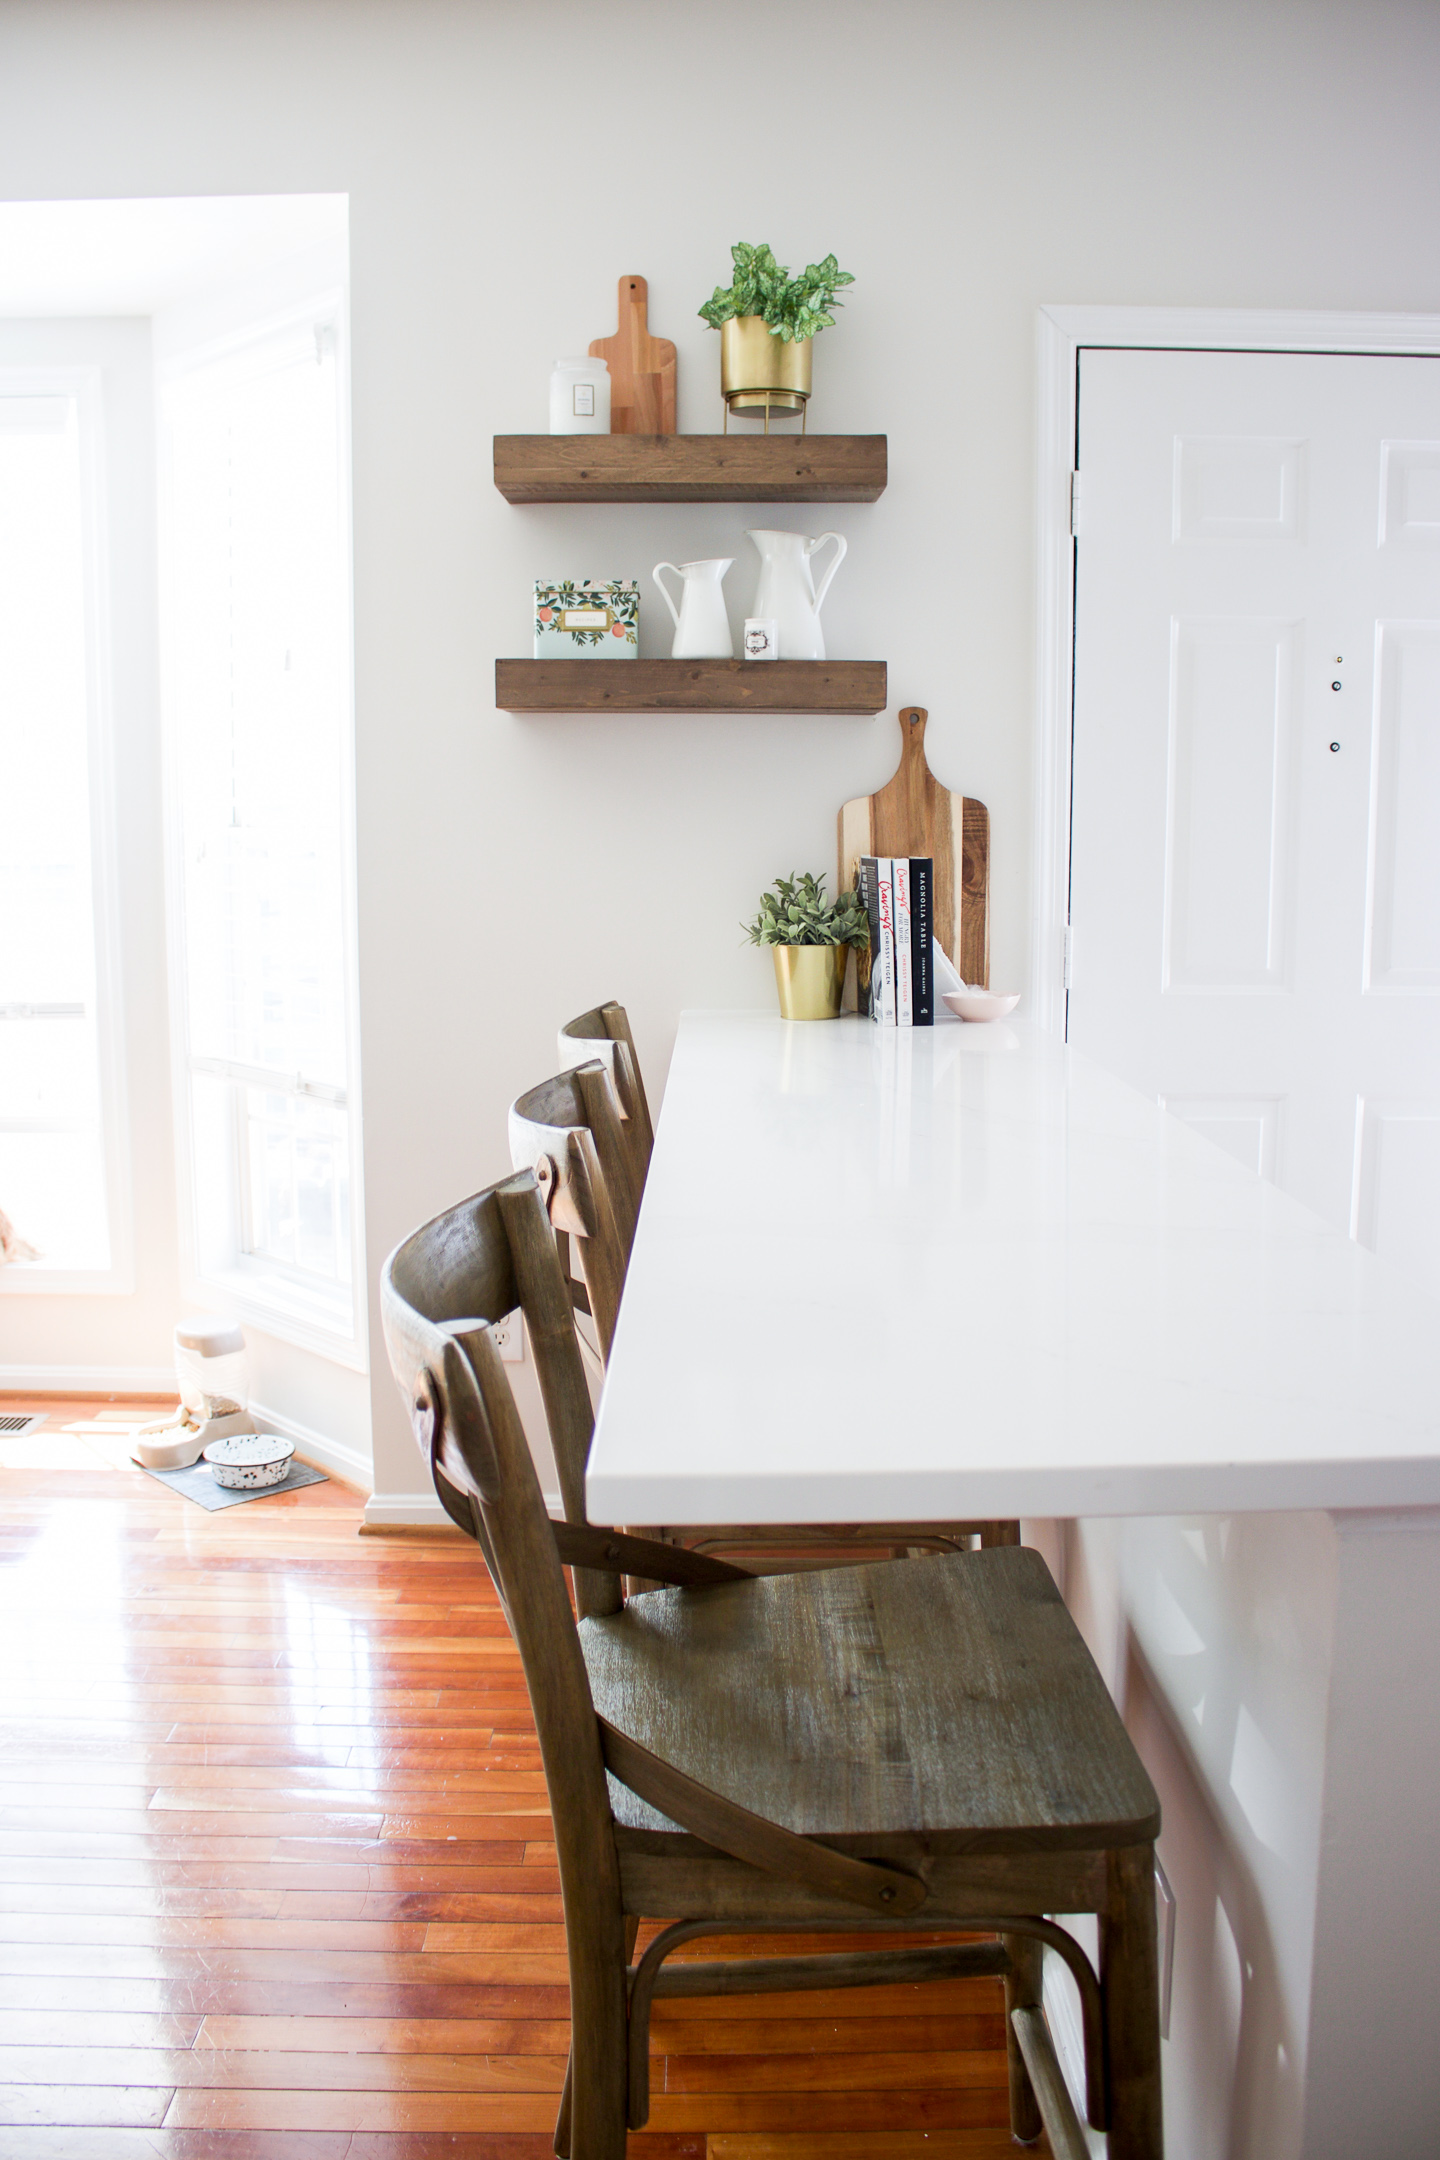
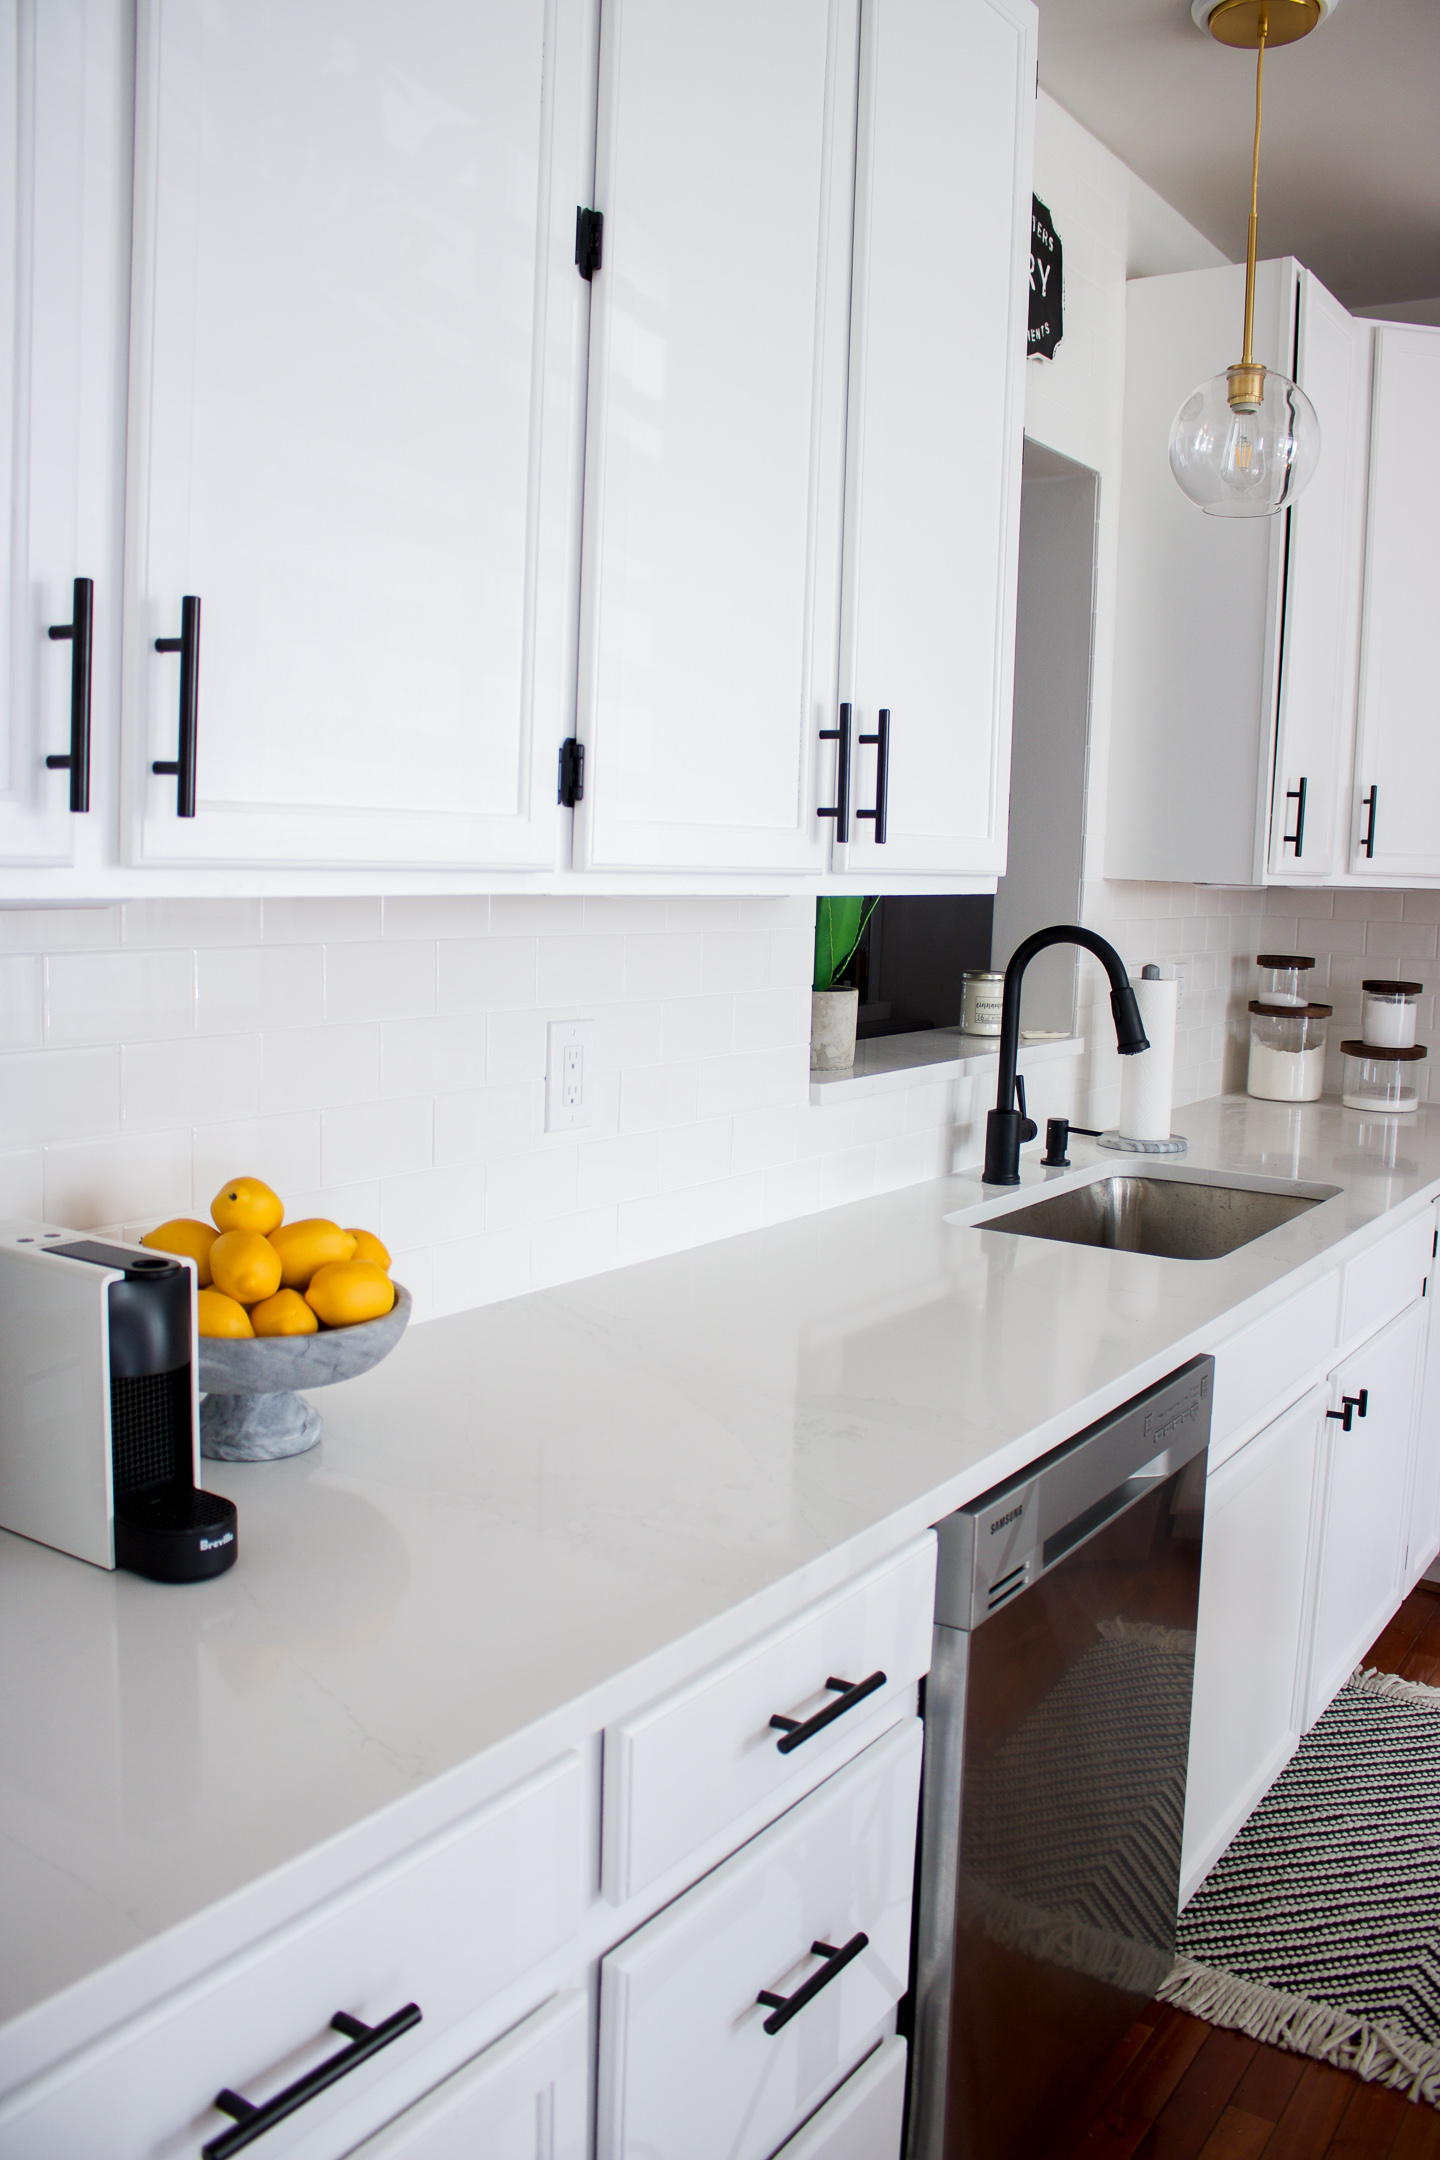
+ added new Quartz countertops to existing countertop space, plus added a sit-up bar to the existing knee wall
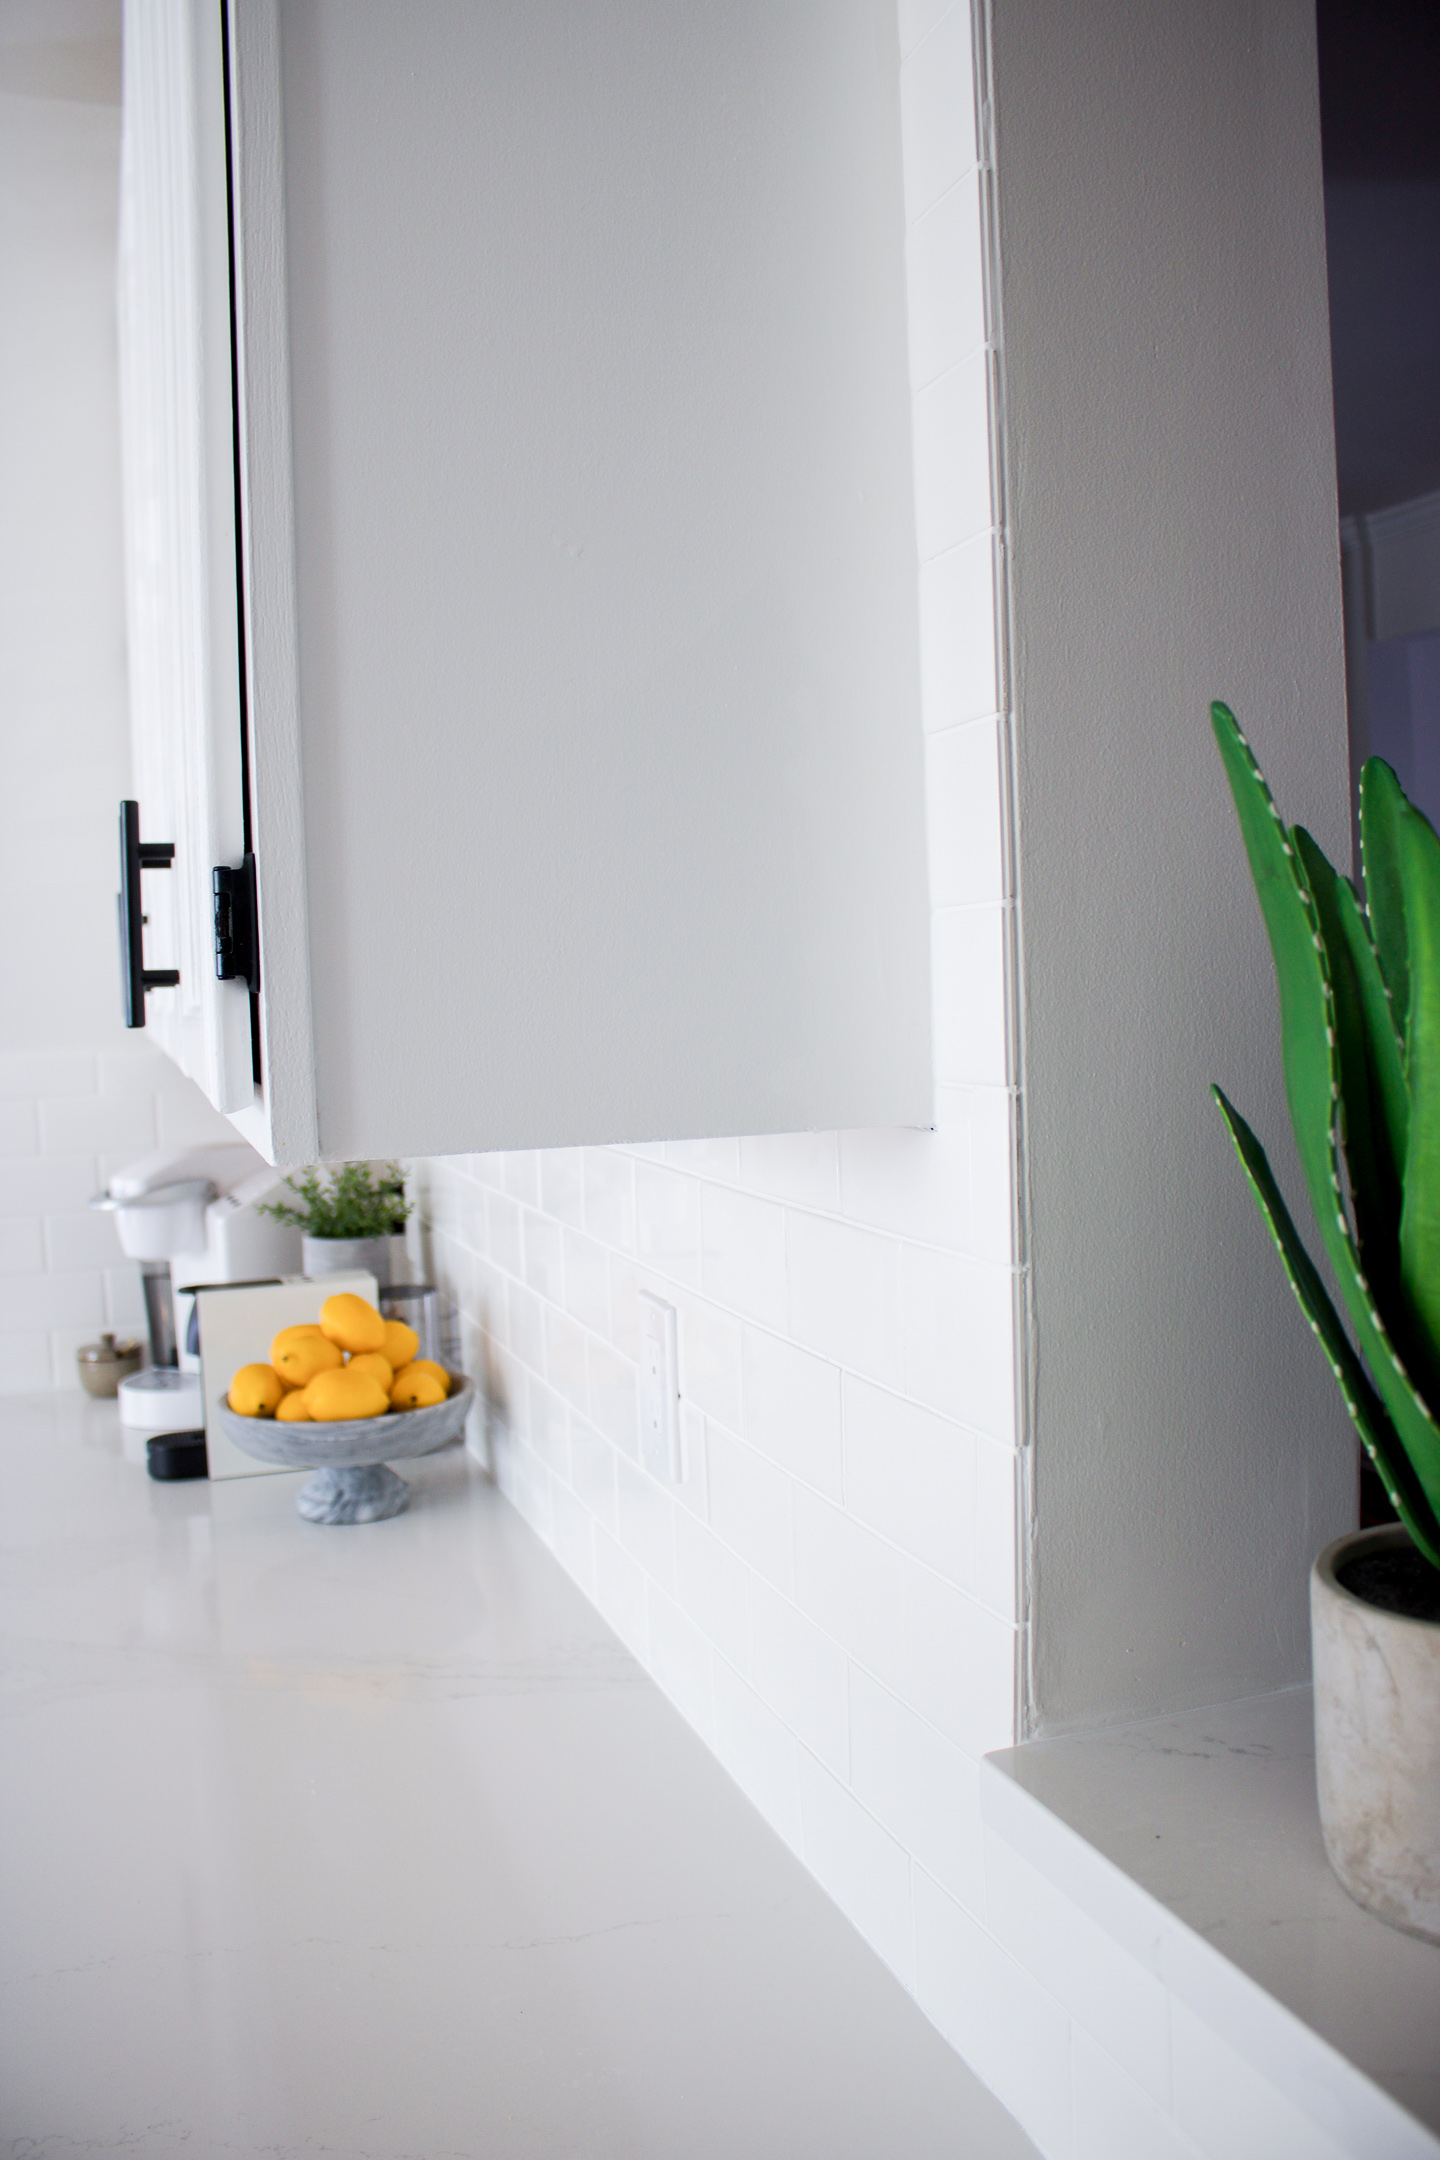
+ hung subway tile backsplash throughout, as well as vertically up the pass-through
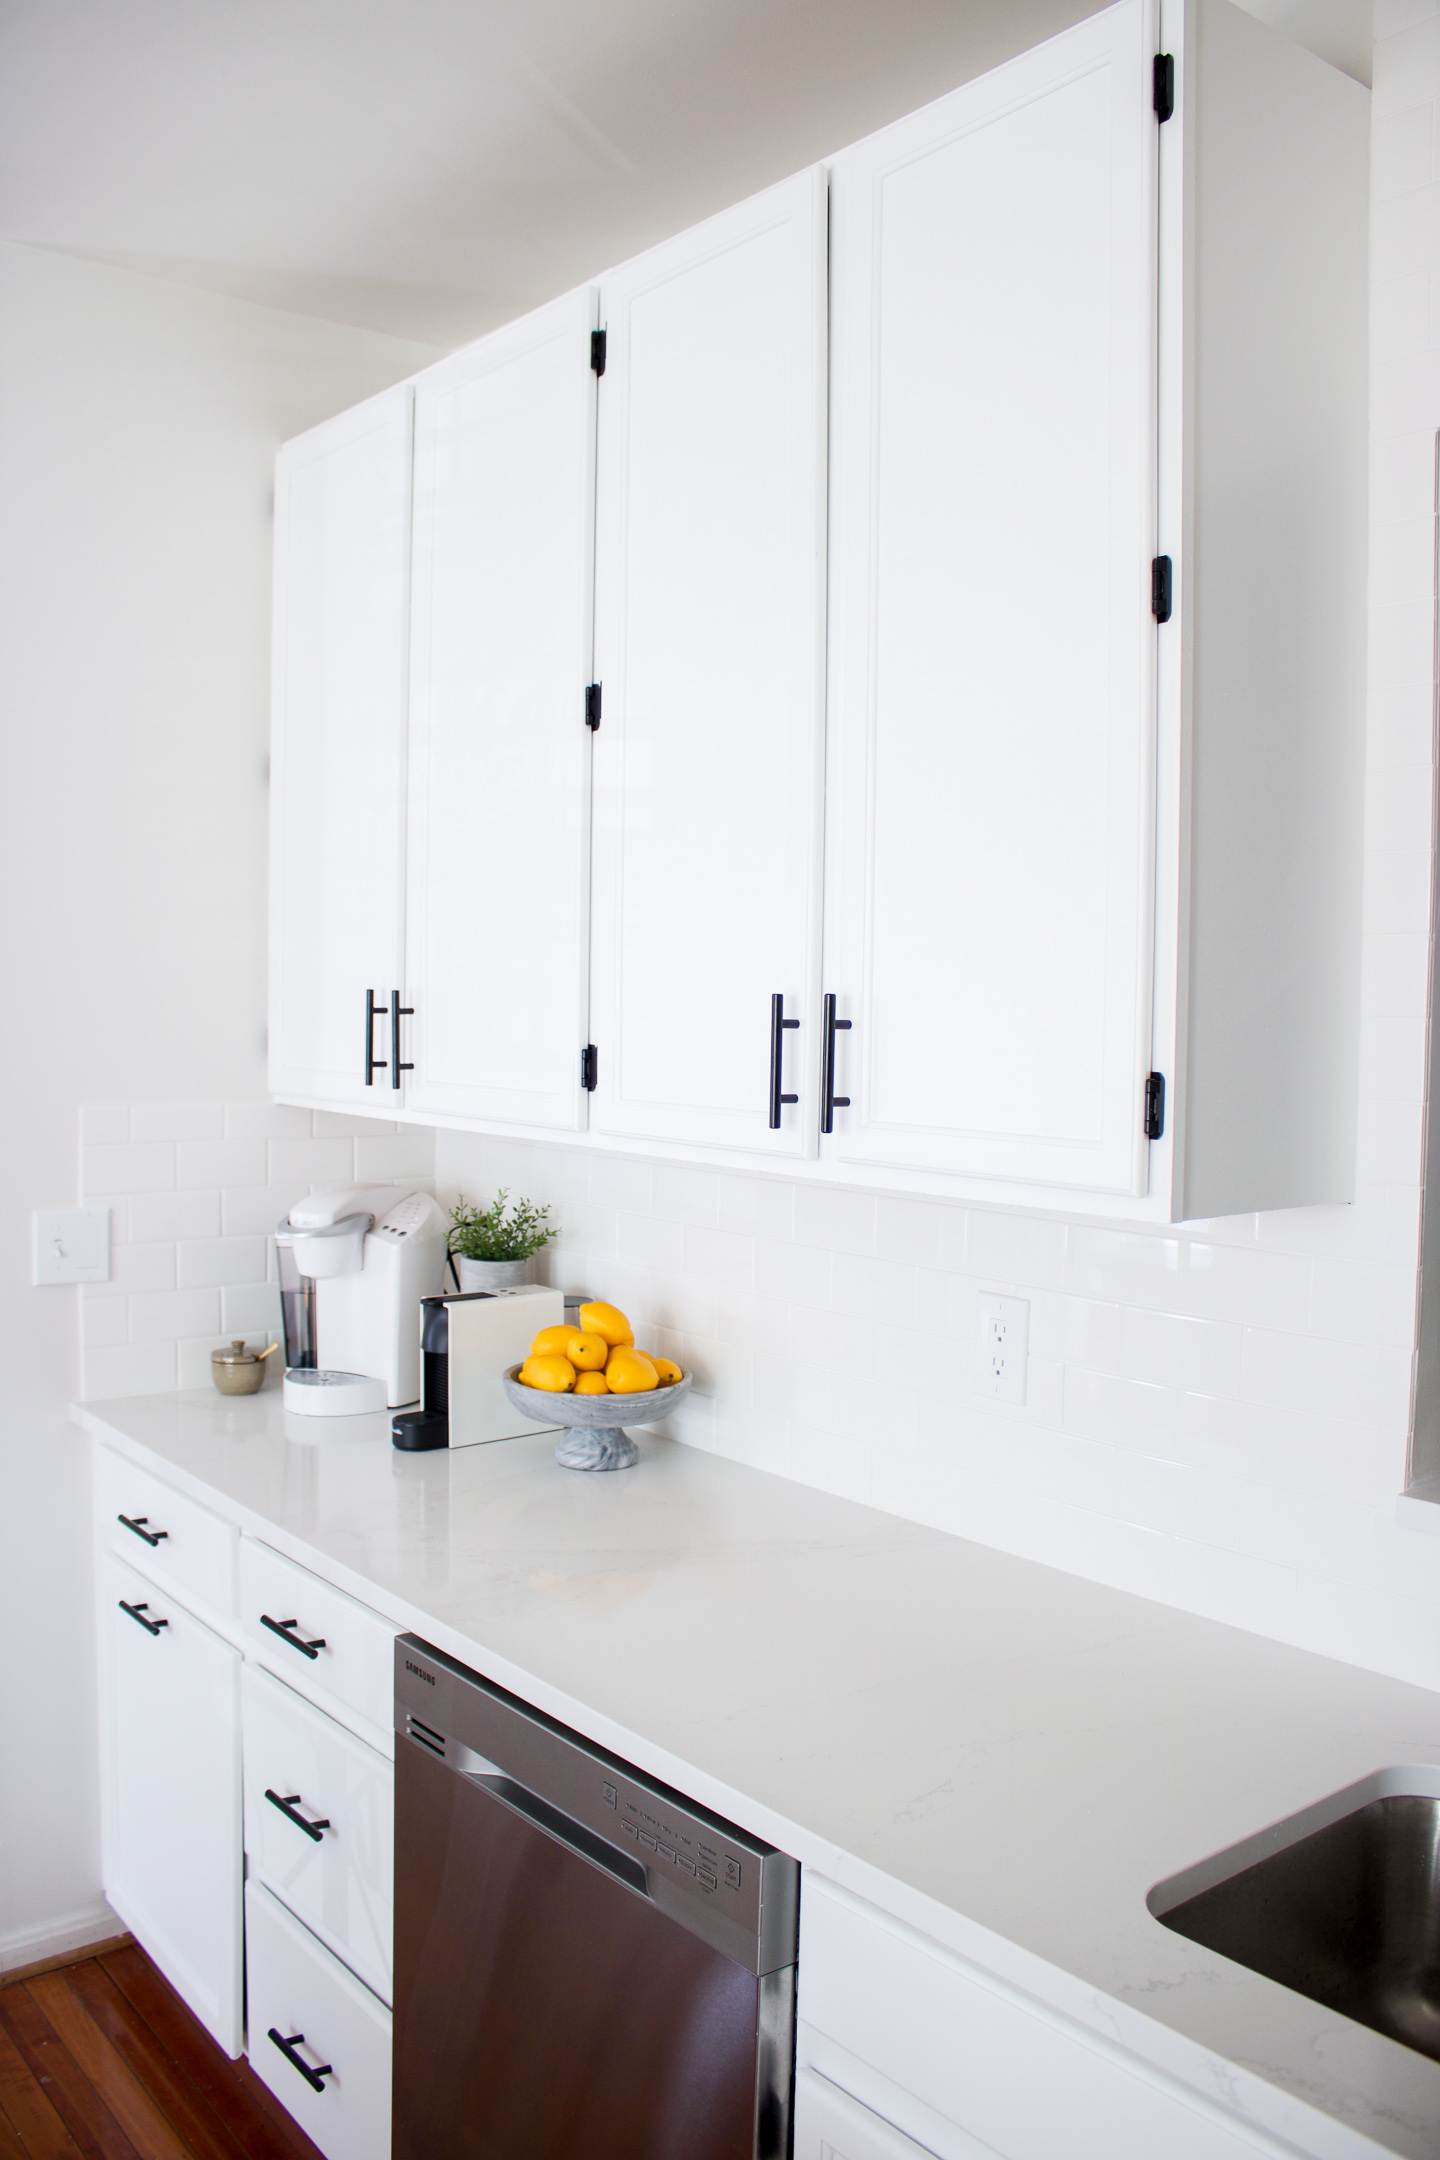
+ sanded and painted one coat of white paint on the cabinets (to freshen them up!)
+ spray painted existing hinges to match new hardware
+ added hardware to all cabinets
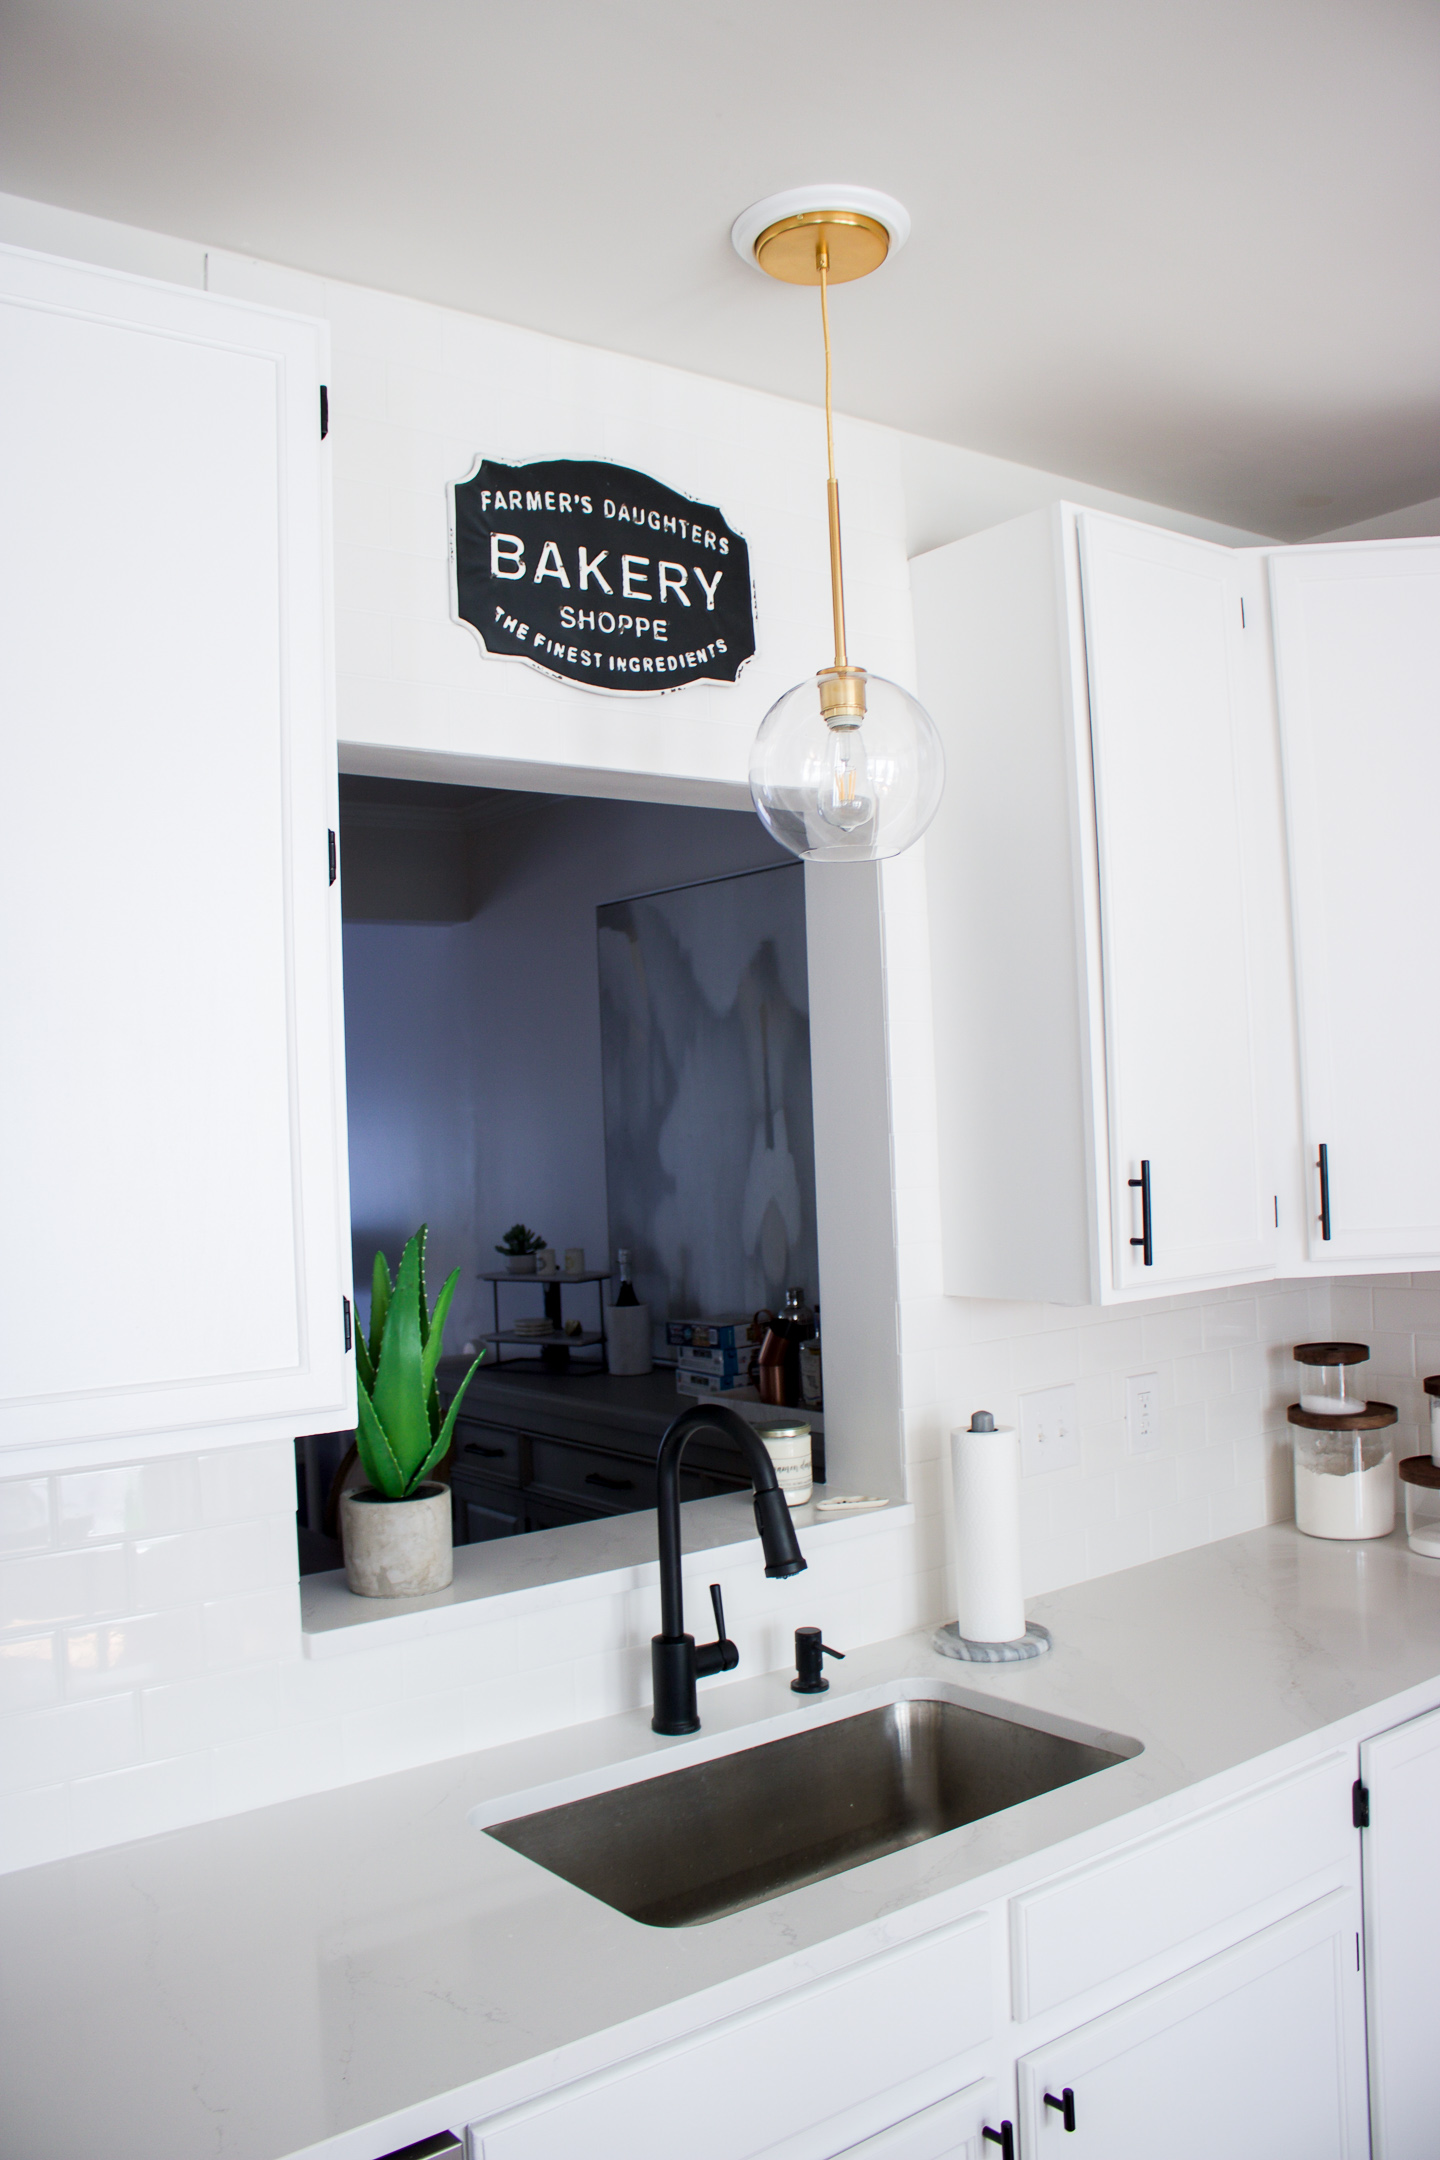
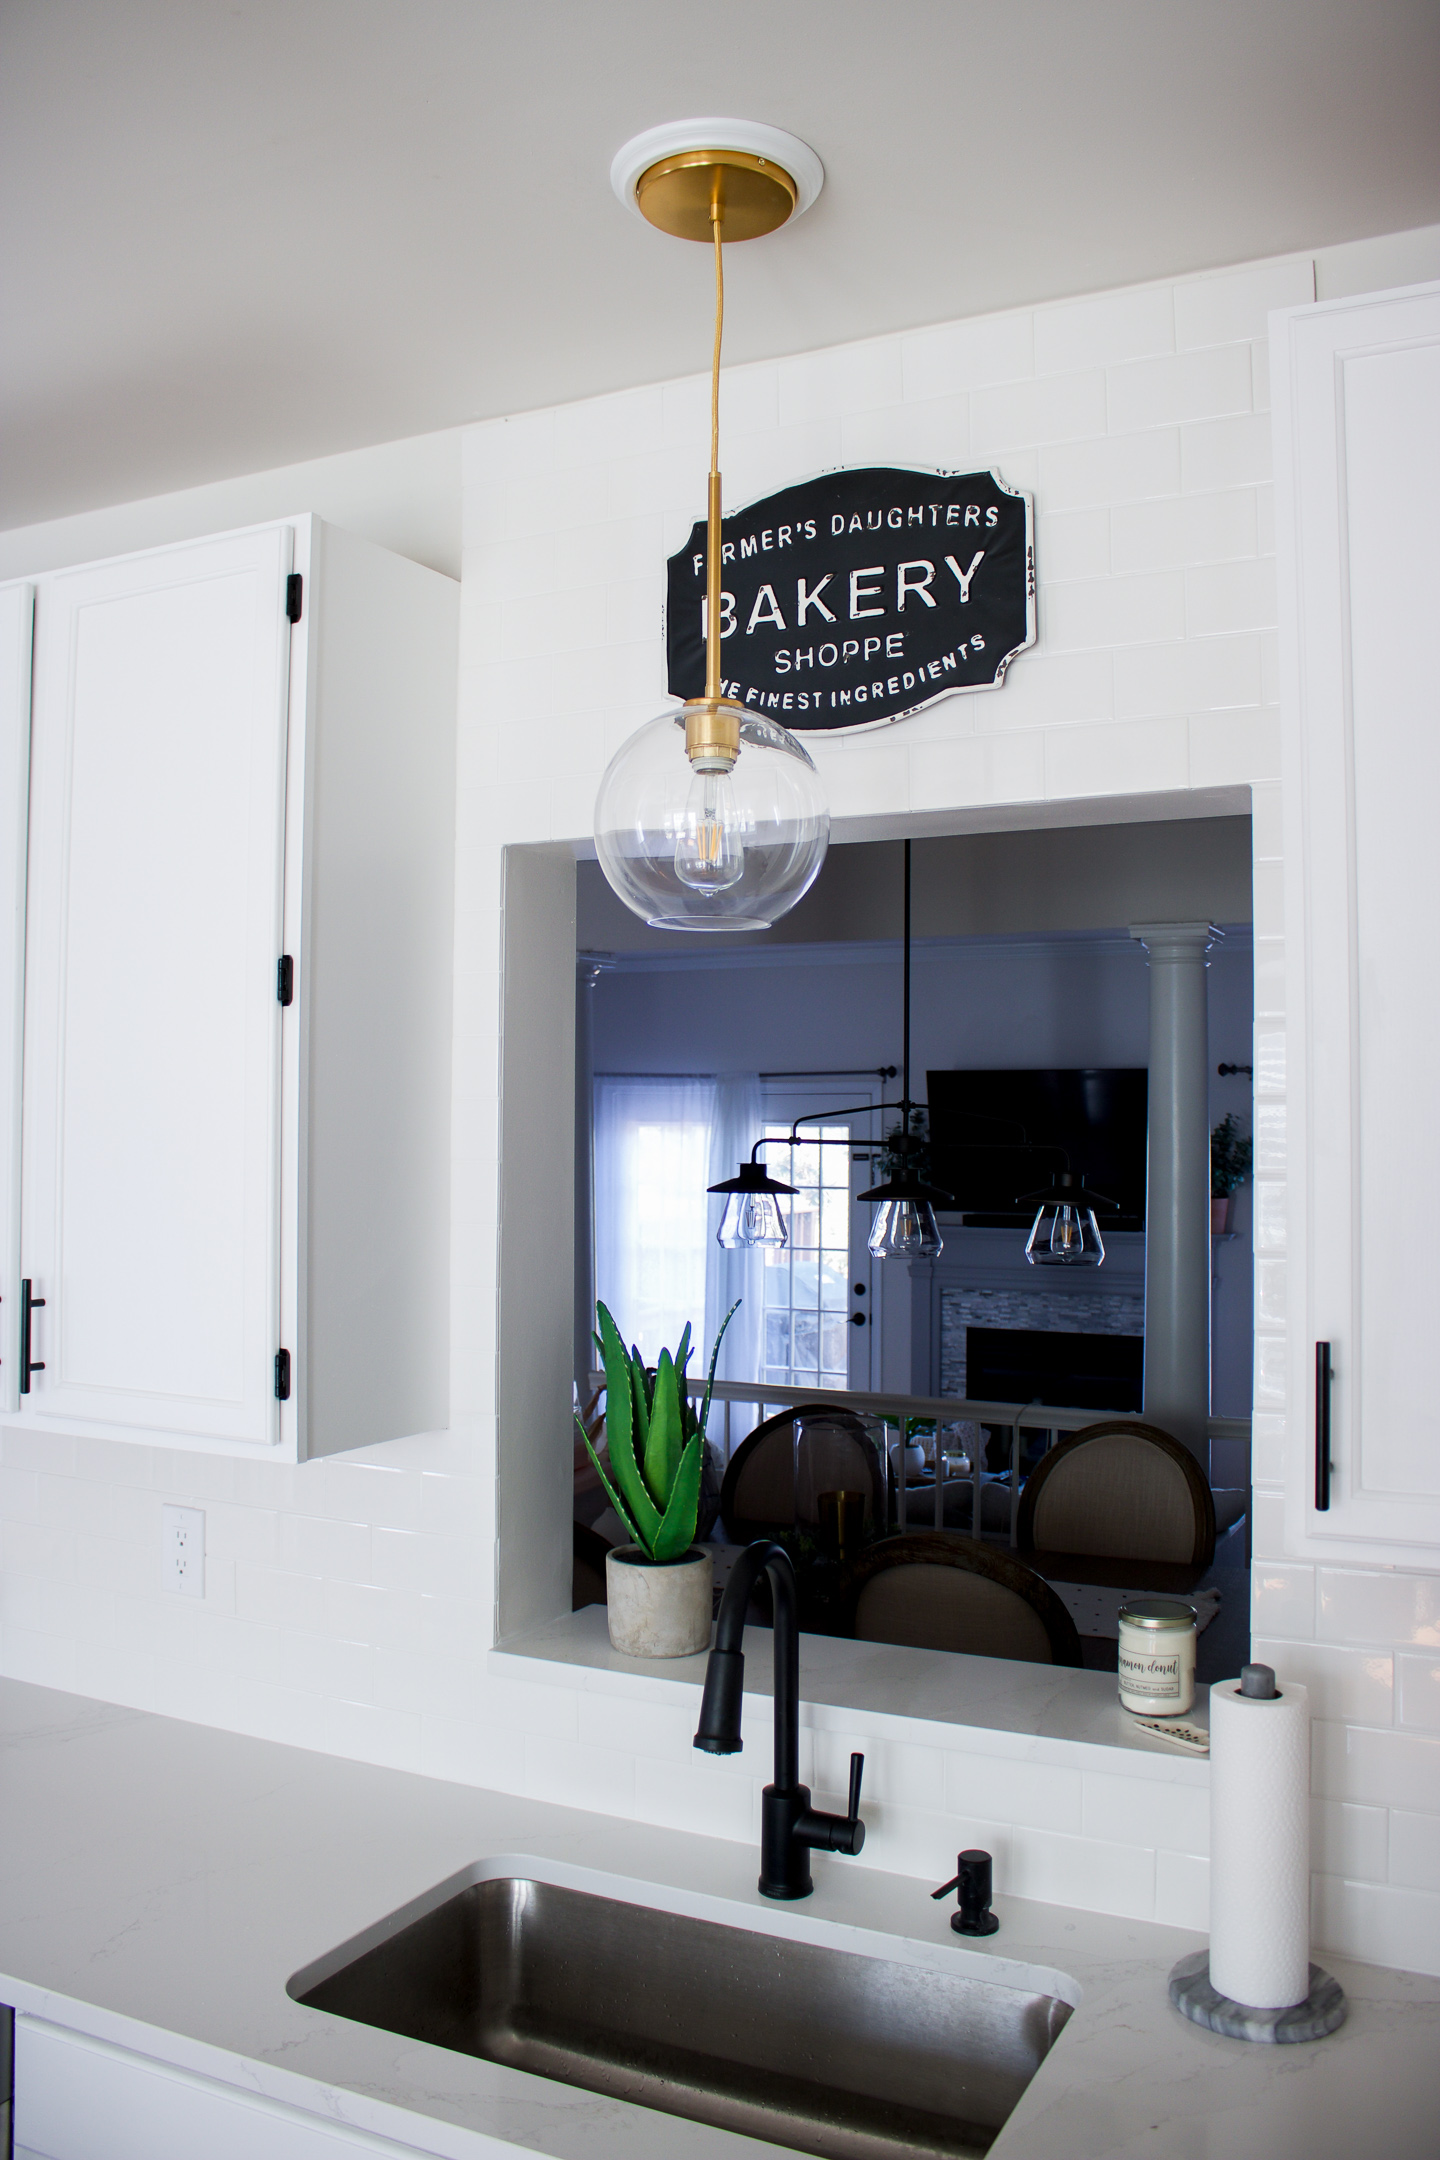
+ installed a new sink and faucet
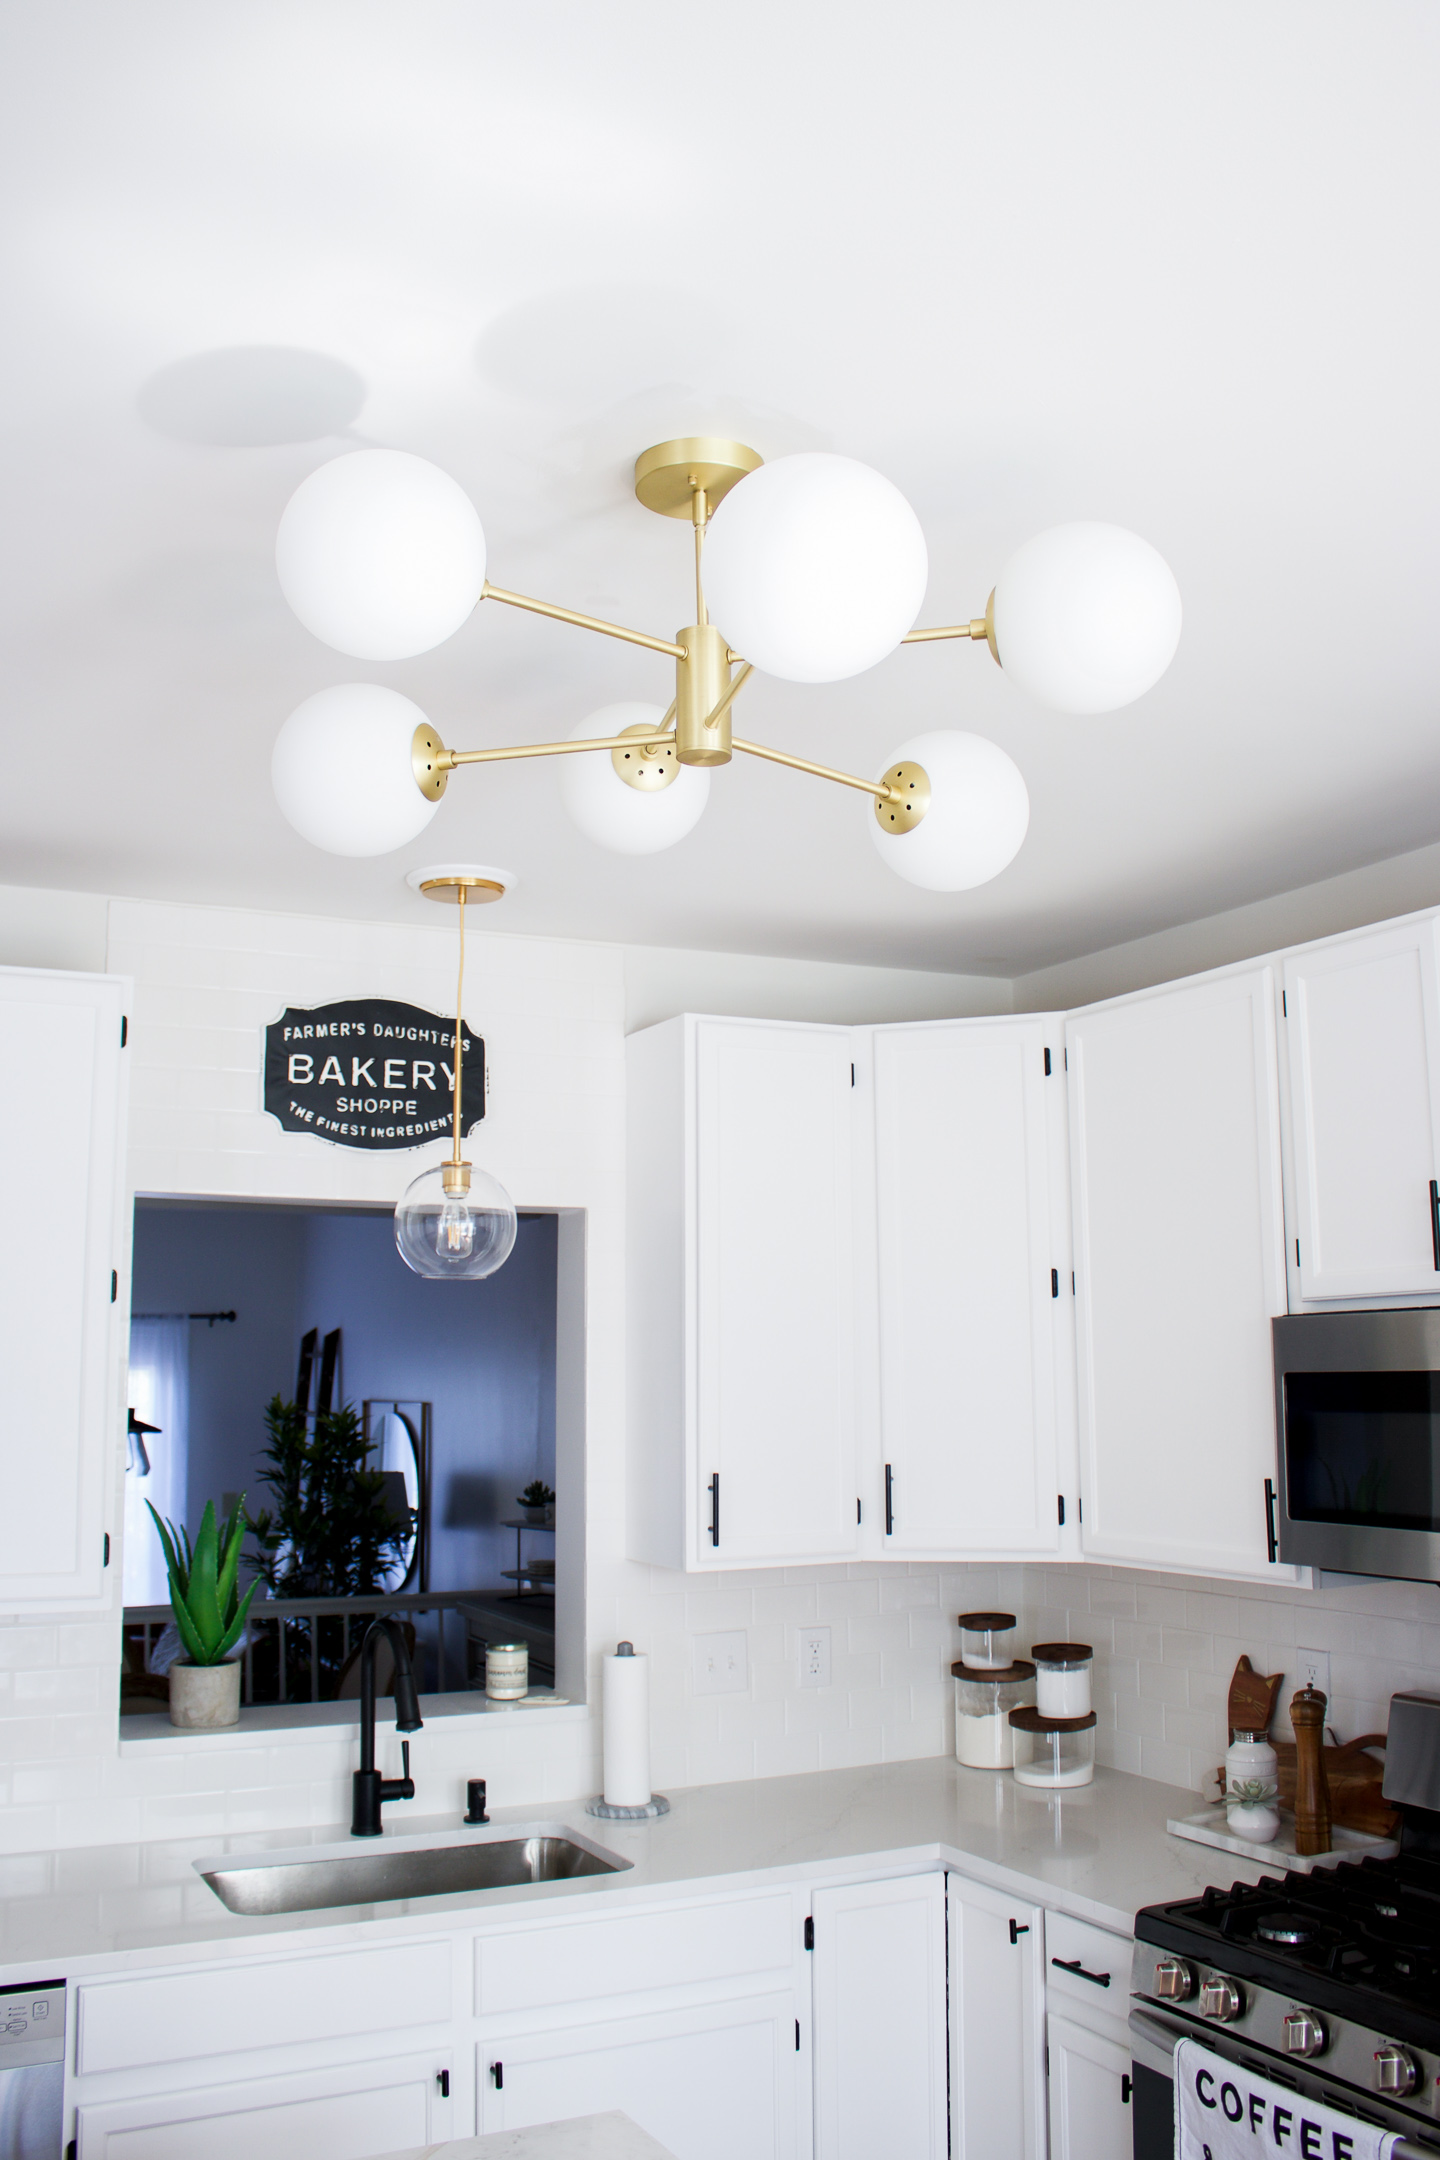
+ swapped out main light fan for new light fixture
+ converted recessed light above sink to pendant fixture
+ switched out old (mis-matched and discolored) outlets and plate covers for new ones
It was a lot of work and took a lot of energy! I would do it again in a heartbeat for the end result, though!
Here are a few more Before and After comparisons:

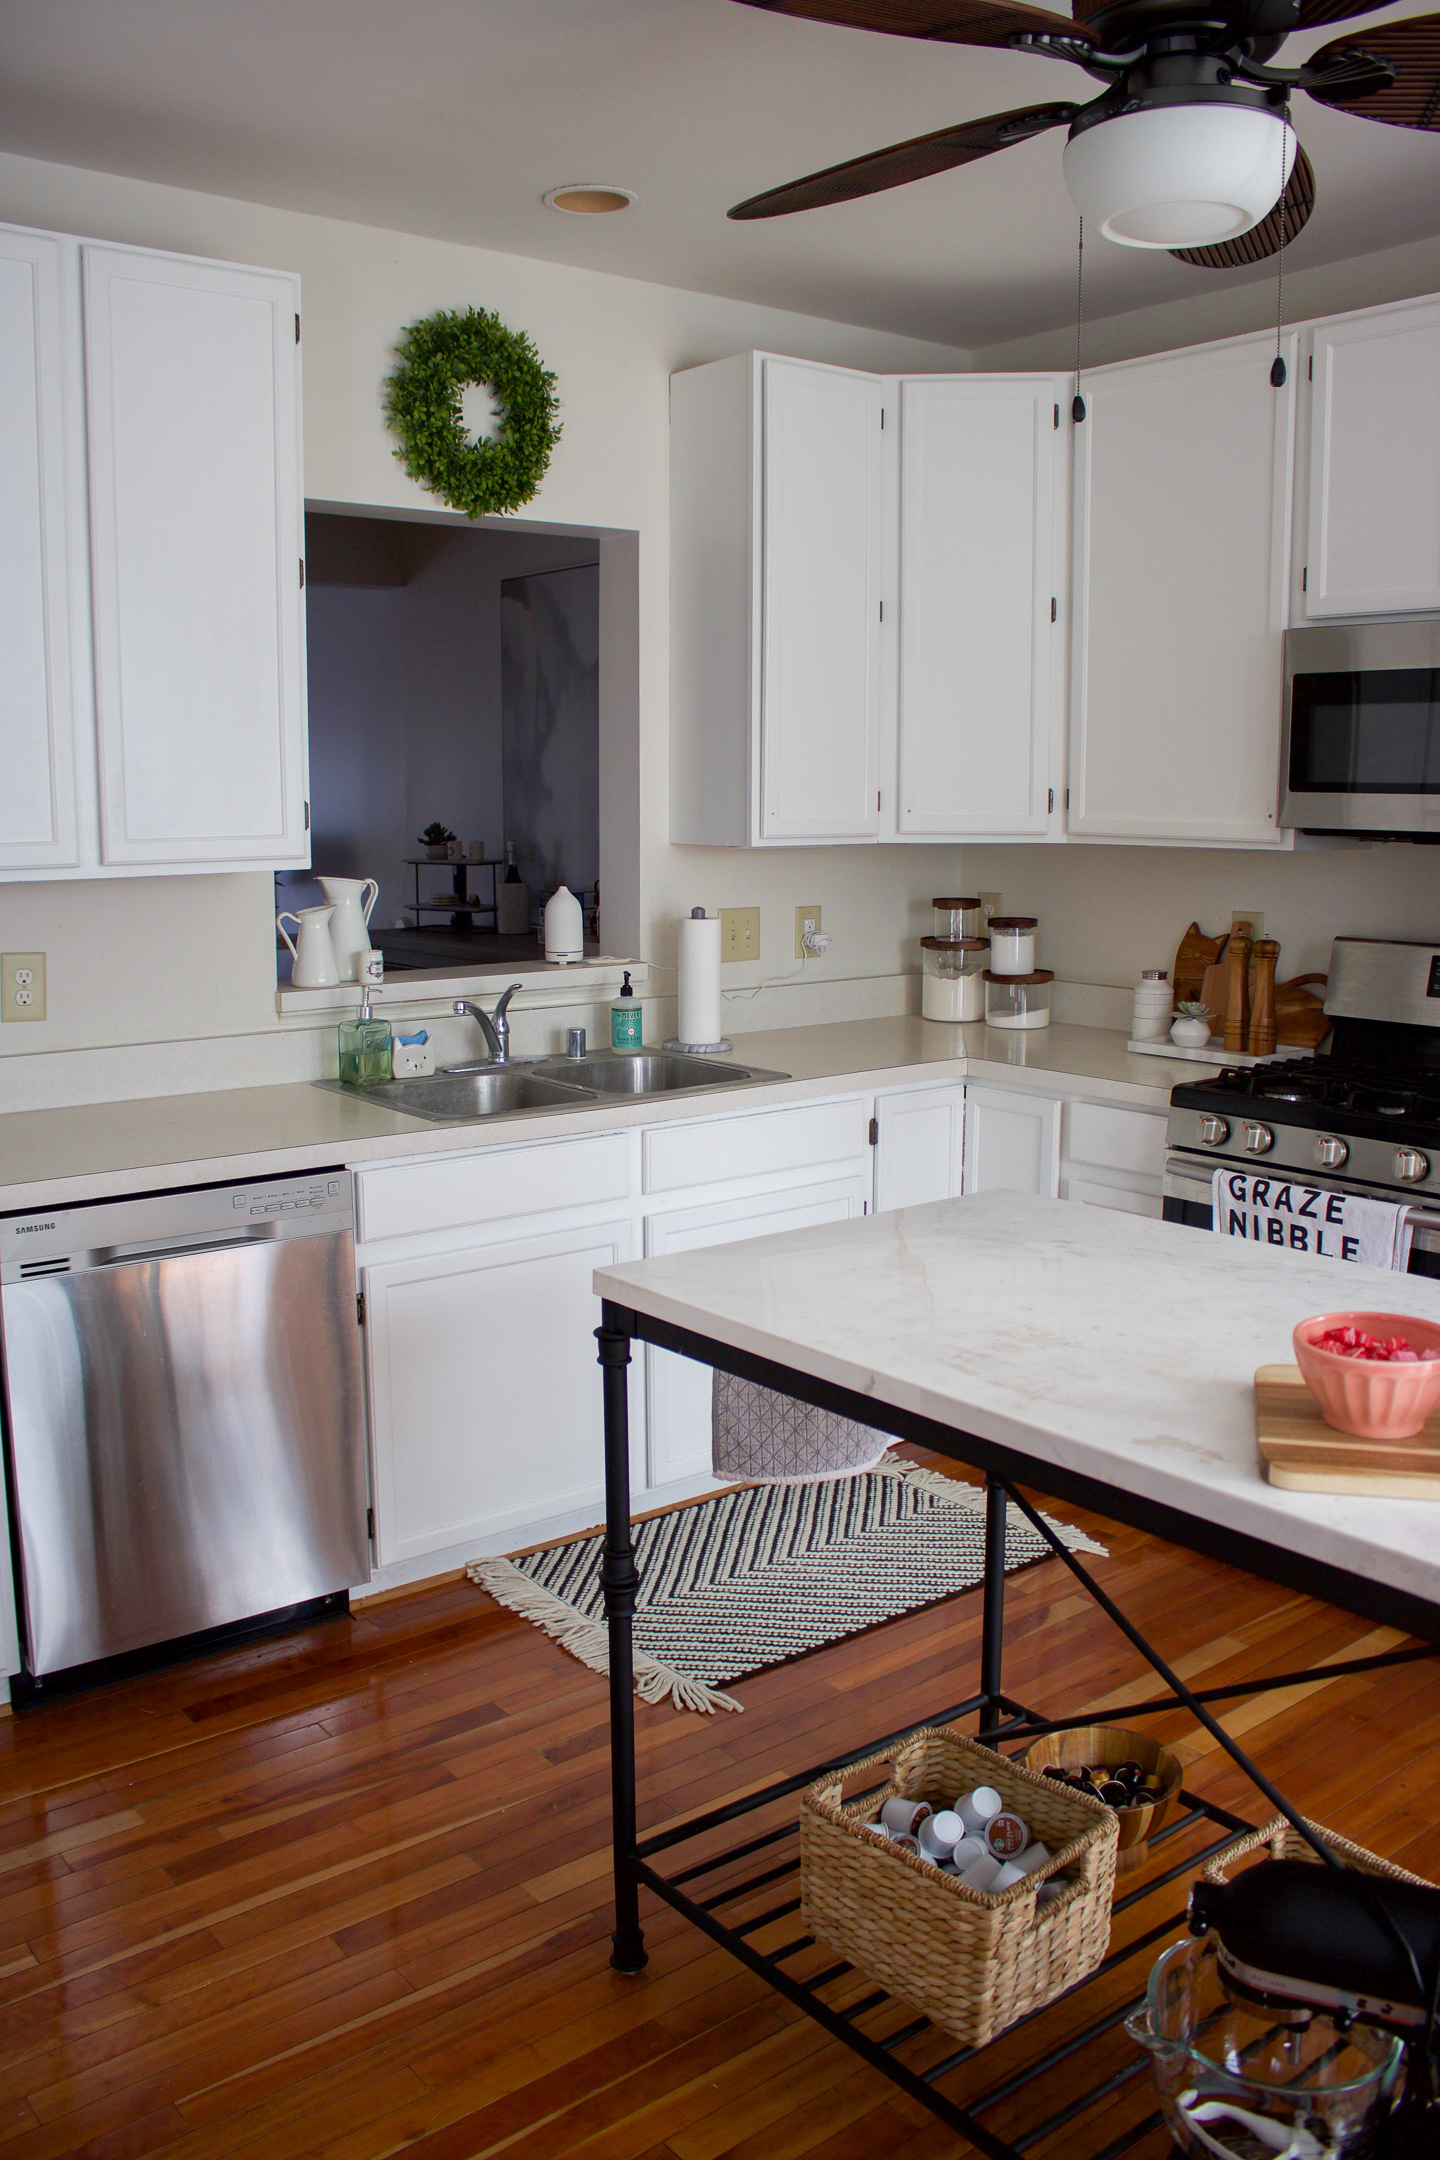
One of the biggest differences, in terms of how the room feels when you’re in it, was getting rid of that big, dark, low-hanging fan. It was the first thing that would catch my eye every time I walked in the room and I didn’t like that. Removing it and installed a much lighter-colored fixture that hung significantly closer to the ceiling made the room so much better! As soon as we took it down, the ceiling instantly felt like it was raised 5 feet.
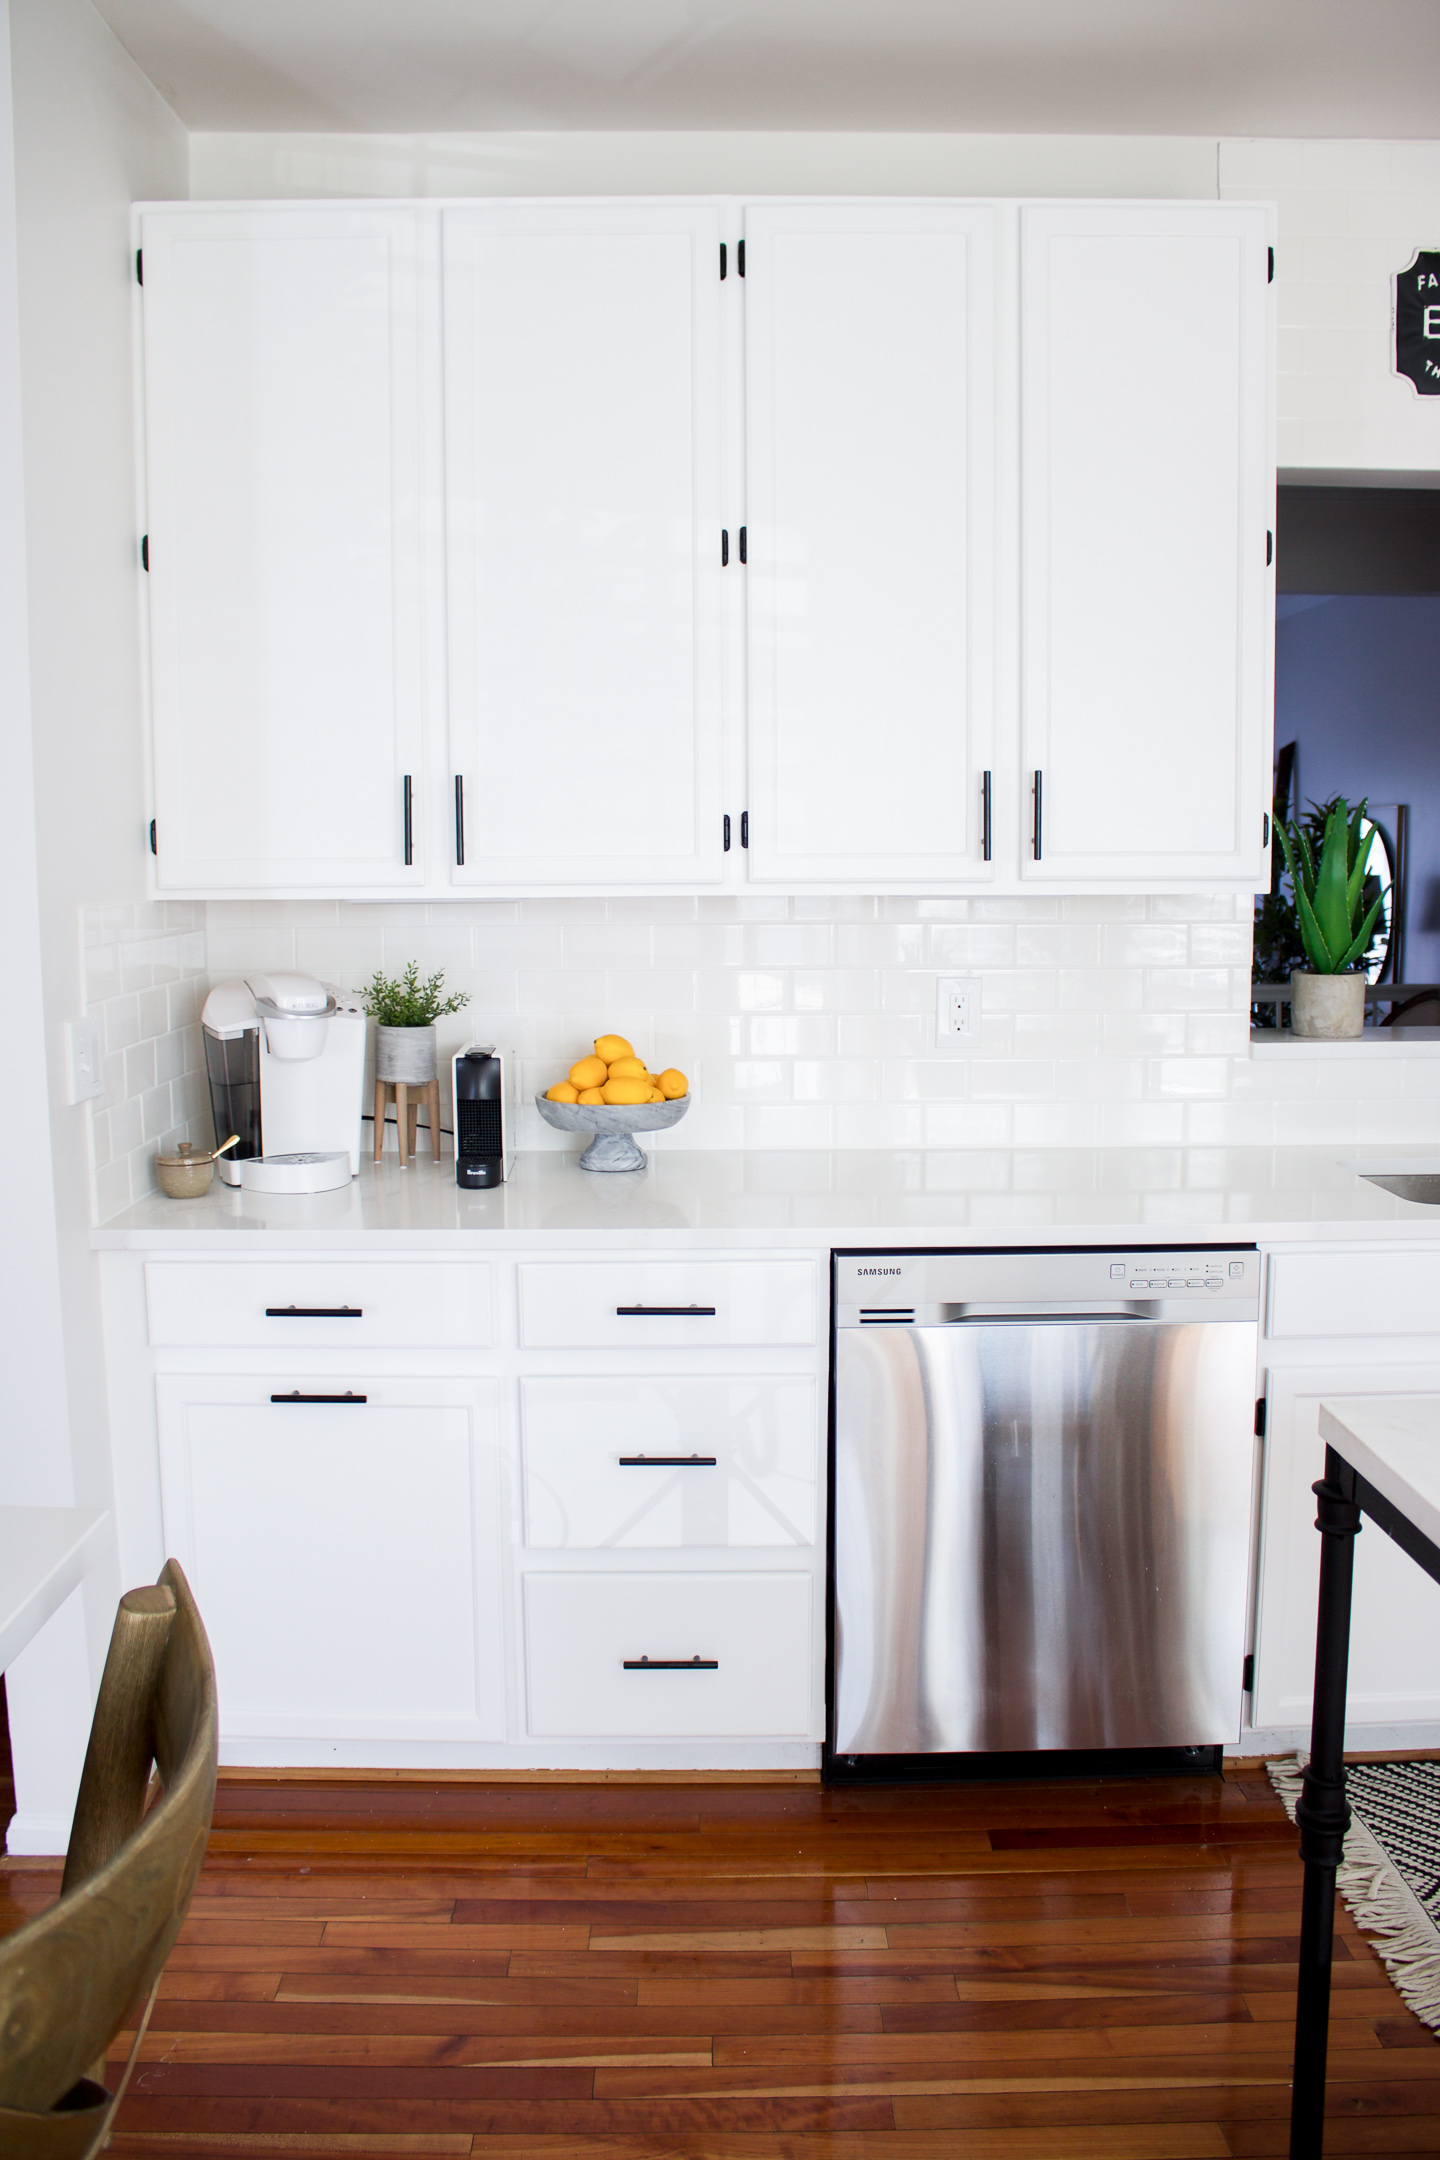
And here’s a look at some of the details, including the new hardware, countertops, and decorative accents we added. For it being my first time doing tiling, I’m so pleased with how it turned out! There are a few cuts that aren’t perfectly in line and a couple bumps in the grout, but nothing that can be noticed unless you’re really looking for flaws.
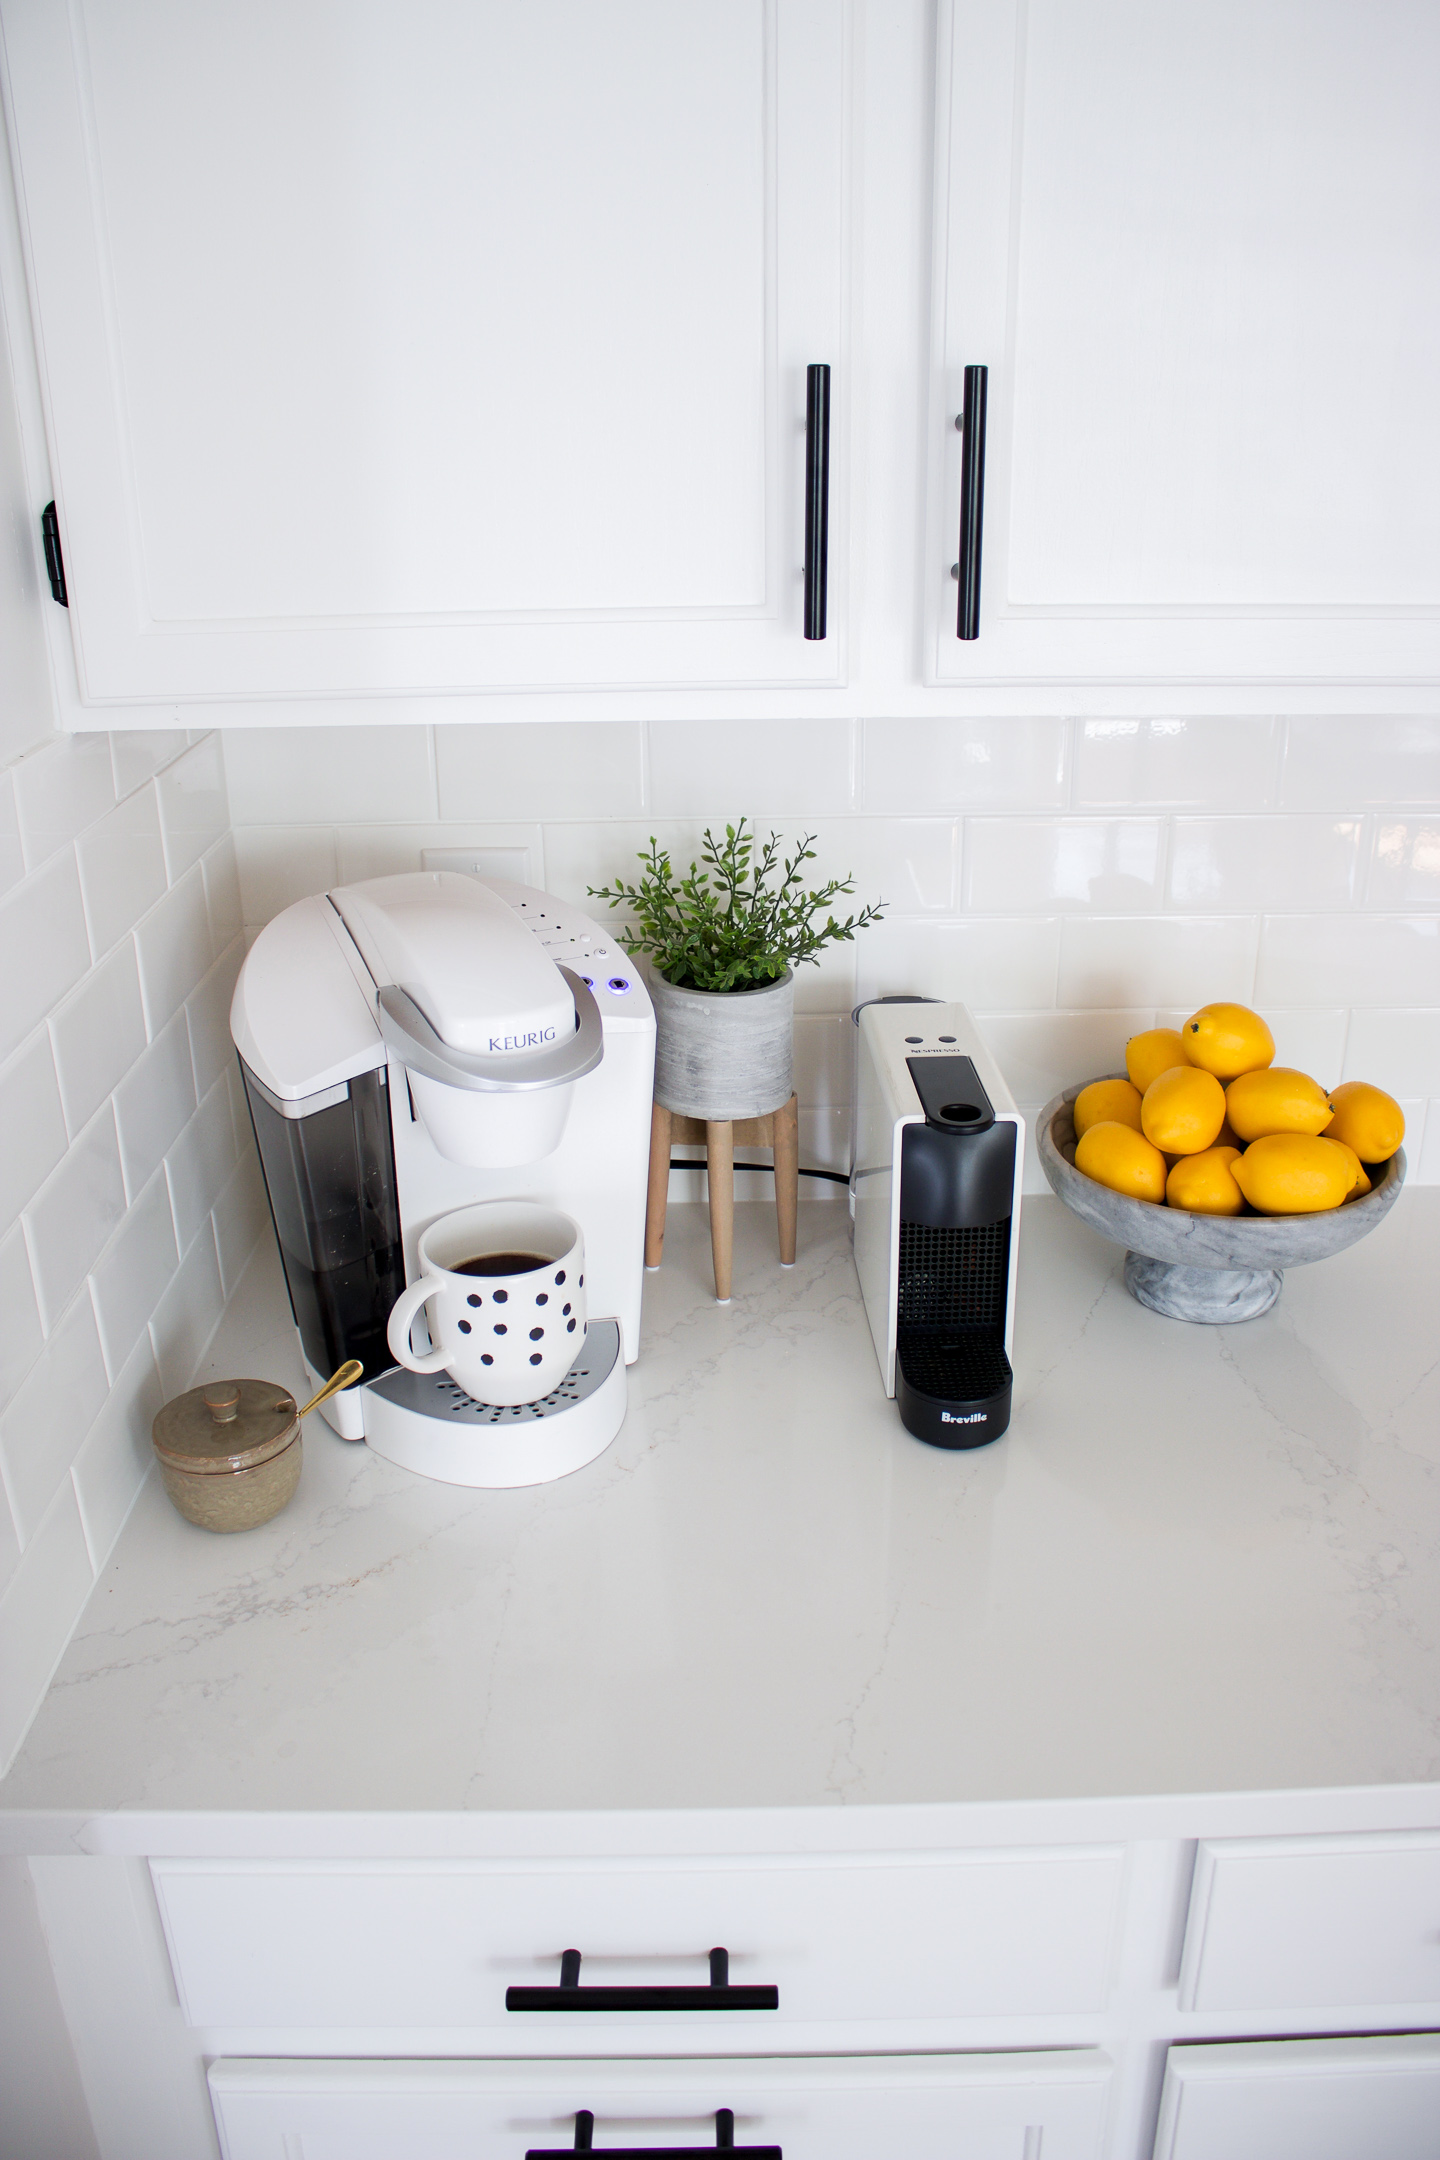
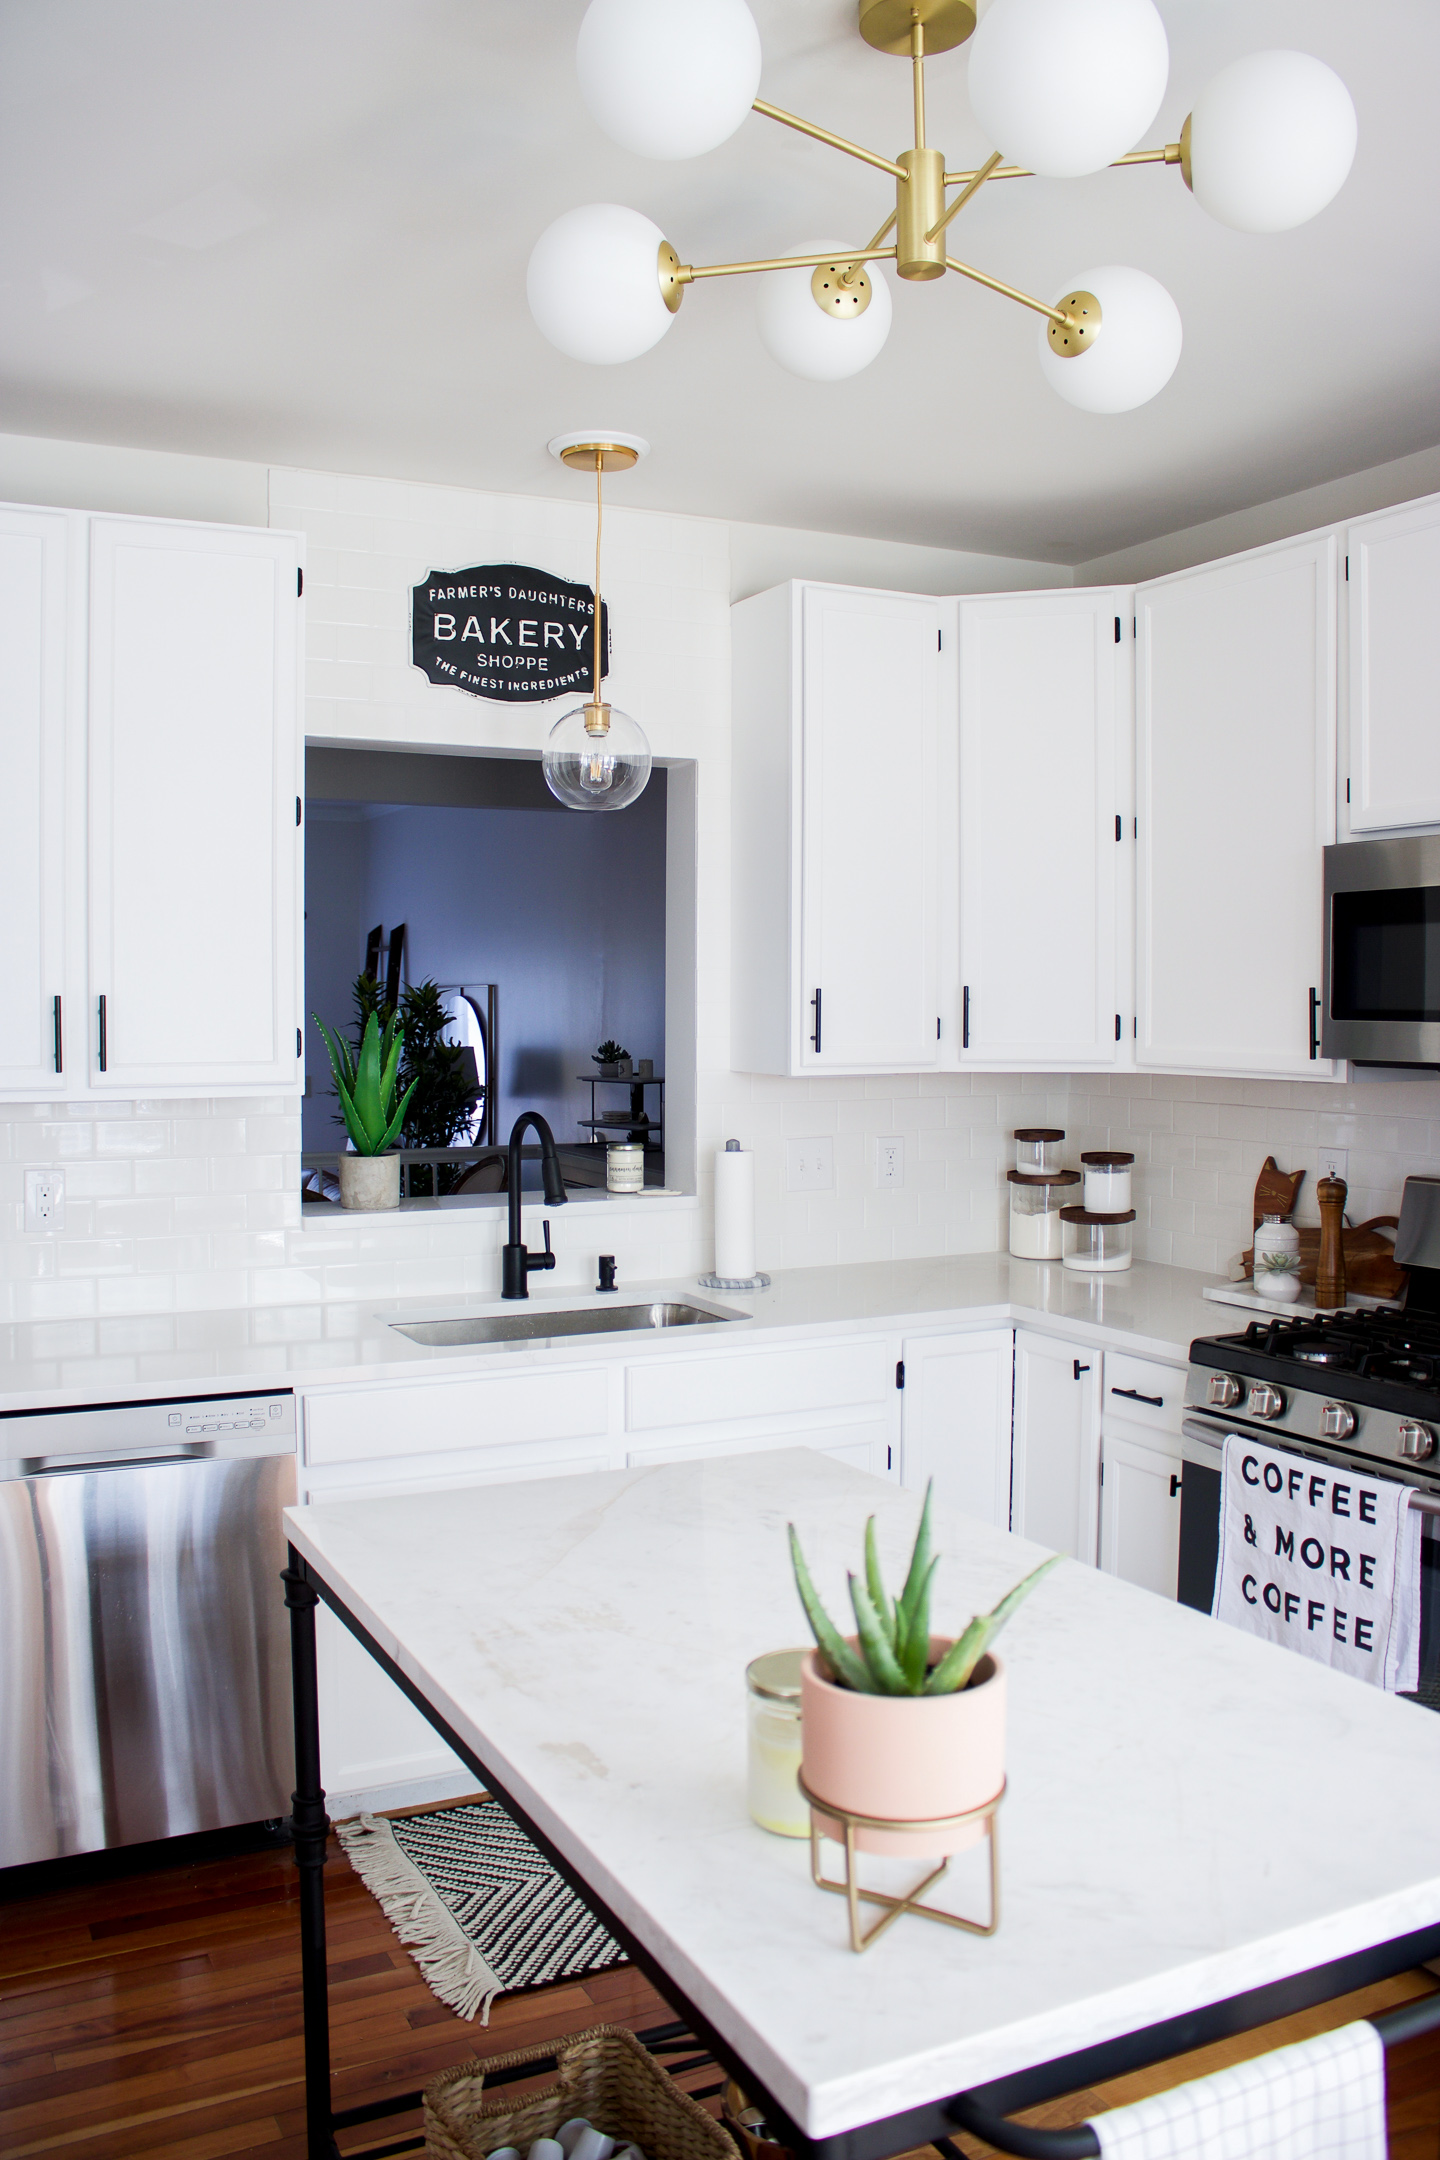
How gorgeous is the marbling in this counter? We were sold from the moment we saw it in store!
My favorite part has to be the addition of that sit-up bar on the knee wall – it makes such a difference! The kitchen feels larger, much more functional, and more inviting. We’re so pleased with how it all came together!
It was definitely a labor of love! I loved being able to take something that was outdated and kind of boring and turn it into a space that we love and are proud of! Home ownership is not without it’s hiccups and hard-to-swallow things sometimes (like unexpected repairs), but it’s been a blessing to be on this journey in our first home. While there would certainly be nice things about owning a newer home, I love that we get a little bit of the character and charm that comes with an older structure (like hardwood floors that creak in certain spots) and plenty of room to work with exercising our creativity and customizing it to our style.
If you’re in a similar situation with an older or outdated kitchen and want to make some improvements but don’t know where to start, a little can go a long way! Painting dark cabinets a lighter color, changing out or adding new hardware, swapping a flush mount light for a fun fixture, ditching the builder-grade faucet for something more modern, the list goes on. You don’t have to spend a lot of money to make a big impact in a space!
What we did with the cabinets:
My mom just sanded down some of the poor paint job that was existing on the cabinets – drip marks, unevenness, etc. She then applied just one coat of the paint that we picked out. Since they were previously painted a white color, there wasn’t much that needed to be done
A few notes on hanging tile:
I highly, highly recommend watching a few youtube videos OR having someone who has hung tile before show you how to do it. It is not difficult, but it does take patience and attention to detail. The most important part is making sure that you’re working on a level surface (we started with the bottom row that edged the countertop, since we knew that was level) and building your pattern correctly. If you’re not level or patterning it out correctly from the start, it won’t turn out how you want it to.
We were able to borrow a friend’s wet saw to make the cuts for the outlets and turns in the wall. Mike did a great job following the lines that I marked up for him and they turned out pretty darn good! I do know that some hardware stores have wet saws in the store, which you can bring tile to have cut. Getting precise cuts is important because you want to make sure the tile is still in the pattern and won’t be poking out of the outlet covers. Again, watch a couple YouTube videos to see how others do it!
Sources for all the things:
Countertops – Silestone Quartz in Calacatta Gold (we did them through Home Depot and had a great experience!)
Sink Faucet
White Subway Tile (we purchased from Lowe’s because they had enough in stock – 3″x6″ white tile)
Over-sink Pendant
Main Light Fixture
Cabinet Pulls – long pulls and short pulls
Cabinet Paint Color – Behr Polar Bear
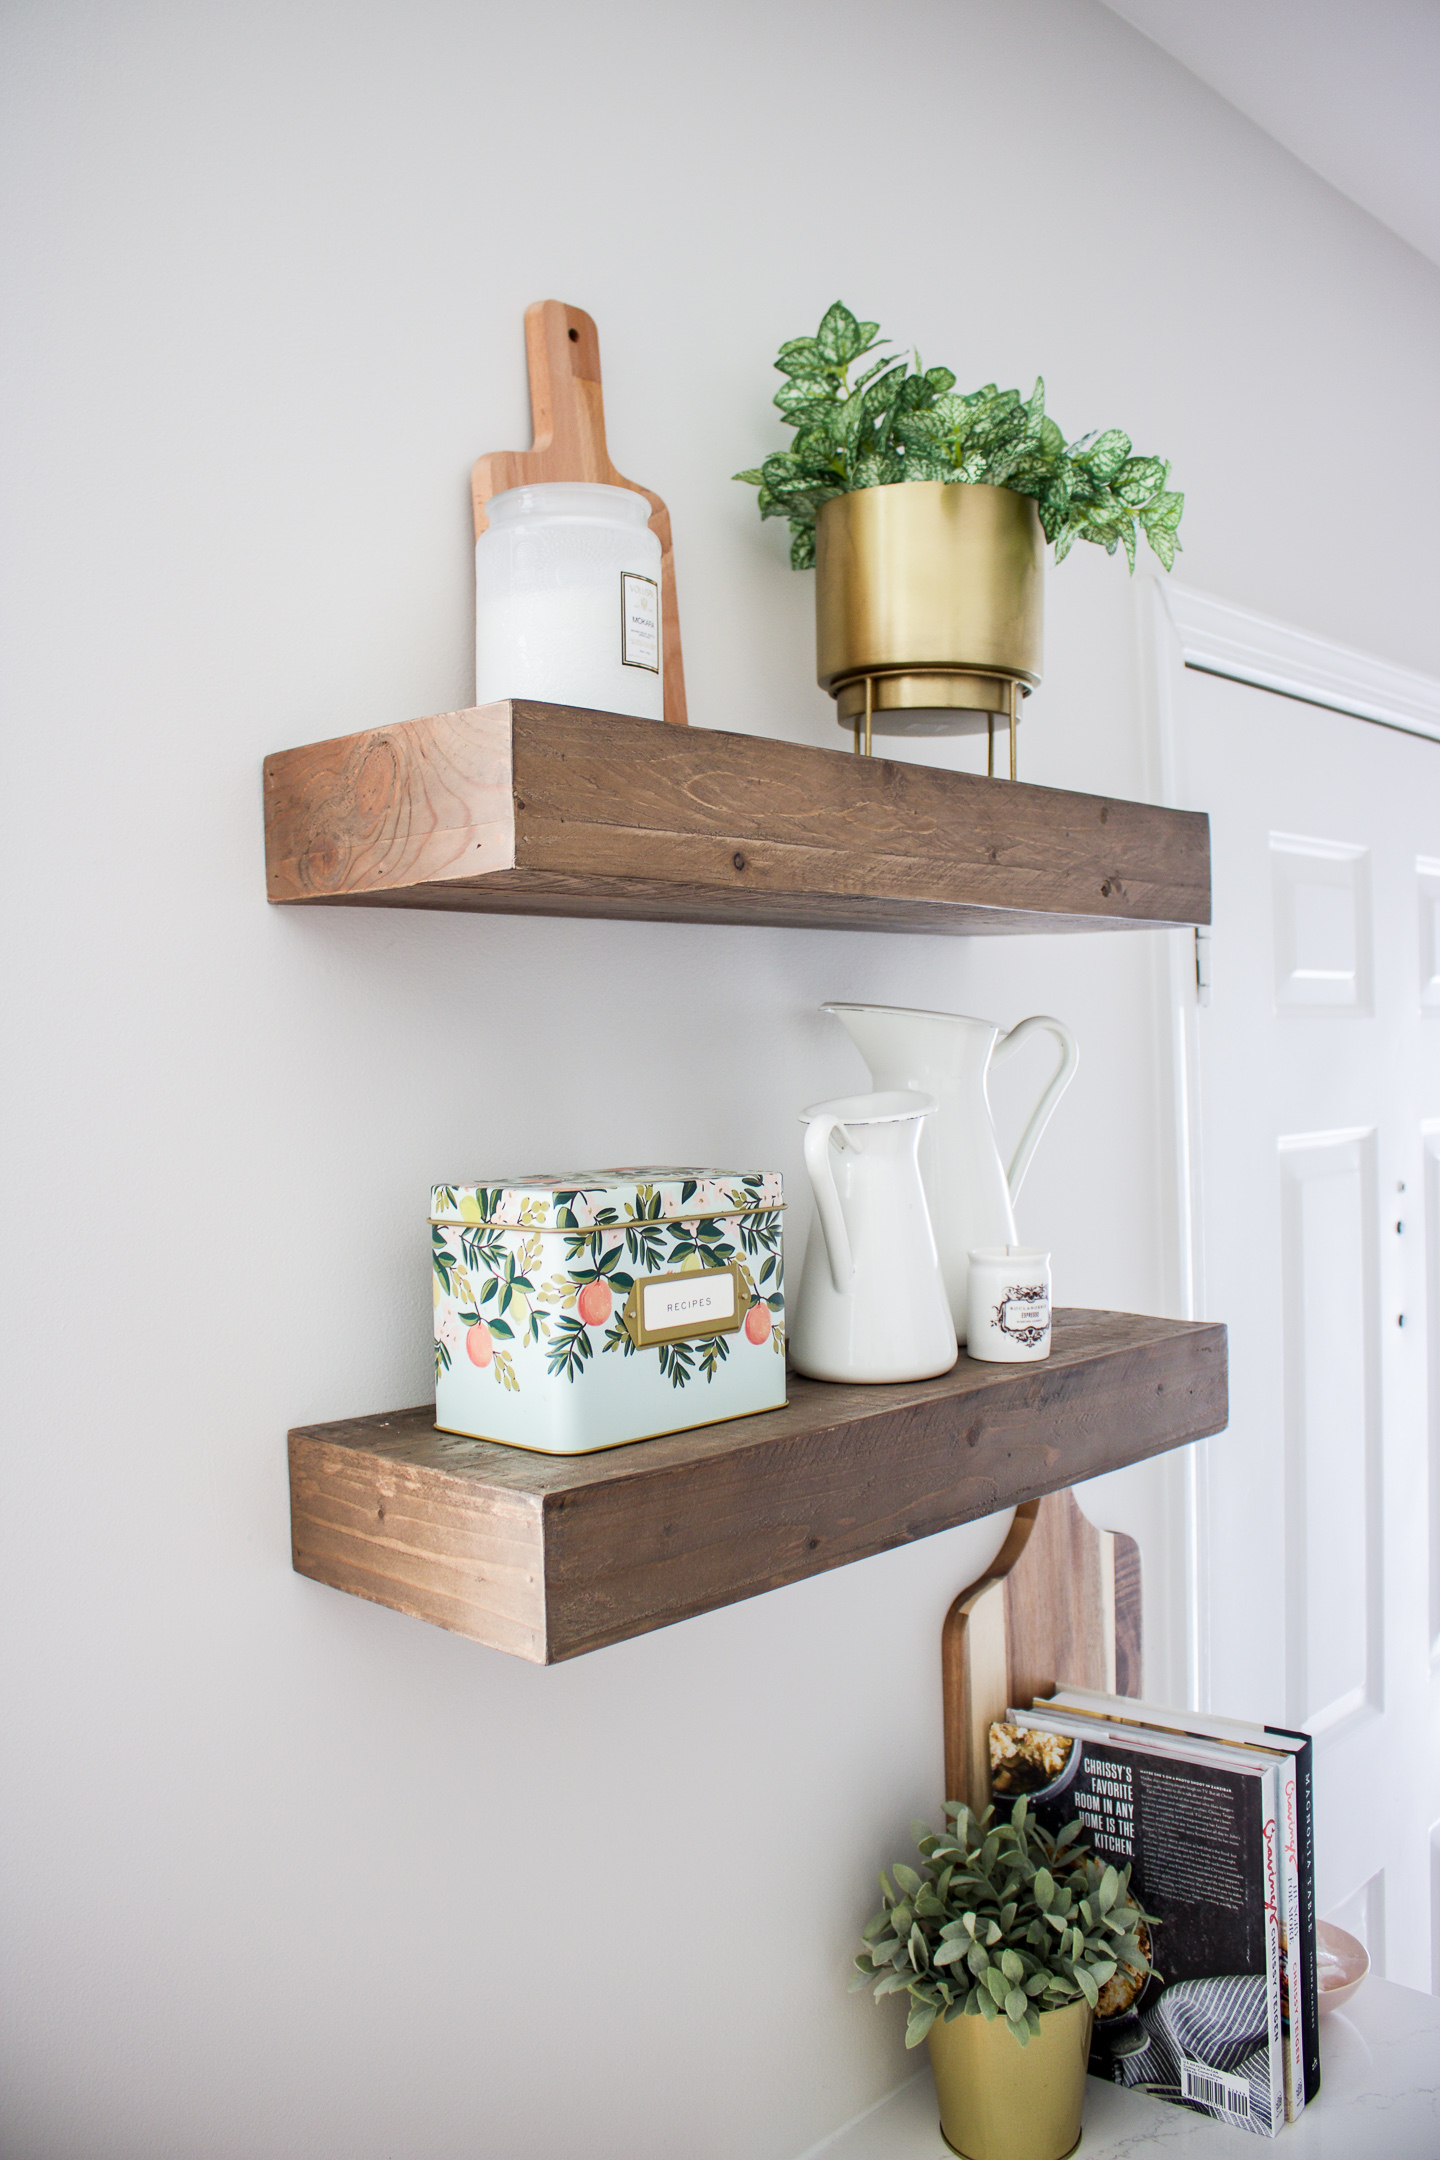
Floating Shelves (2 feet)
Counter Stools
Kitchen Island
Bakery Sign above Sink was a lucky Home Goods find!


Hi Lauren,
I’m curious- Did you do this work yourselves? Counter top replacement, sink install, outlet replacement? Or did you have a contractor come in? I’ve been wanting to replace ours but, I’m not sure if
We did everything ourselves except for the removal and installation of new countertops!
It’s all so beautiful! Looks great. Can you share where the rug is from?
Thanks! From Target
I love the update! It has a new fresh look to it. Doing an update is always hard work and you never really know what you’re getting yourself into but the hard work pays off!
Love the countertops! They are exactly what I want to do in my kitchen! Would you mind telling me a ballpark of how much they cost to purchase and install thru Home Depot? Our kitchen is about the same size as yours, minus the island and the new bar you installed (love by the way!)
Ours was a little bit of a different job since we added in a new countertop to a place that wasn’t a counter before (needed a subcontractor for that, outside of the actual installation of the countertops), but we felt the price was very reasonable. Home Depot’s website has a price estimator where you can put in your dimensions and everything to get an idea of what your specific kitchen would be!
It all looks BEAUTIFUL! So clean, fresh and high end! Great job your sweet family did!!
Thank you so much!
What an amazing, light, refreshing room! Love that sit-up bar. You have great taste – everything is just so clean & timeless. Must feel great to know that your hands & hard work made that kitchen into what it is! Love it!!!
Thank you so much! I appreciate that!
Absolutely love it all! My favorite is that you made that low wall a counter space/place to sit! Such a great idea and those light fixtures (as I said in your inspiration post before) are EVERYTHING.
Hey I love your kitchen! Can you tell me what paint you used to paint your cabinets? Love them!
Thanks! The paint name is included at the bottom of the post!
Love, love the new look. Your whole family is so talented when it comes to picking our home decore. Would you mind sharing what kind of paint, brushes etc your mom used on the cabinets?
Just standard paint with a roller and brush for the detailing around the moulding on the cabinets.
It turned out so amazing! Great job!
XX, Laurelle
http://www.bellebylaurelle.com
Hi Lauren!
Love your kitchen! I know the island wasn’t part of your updates, but I was curious what you think of the quality of it? I just moved into a new home and I have been looking for an island similar to that! Thanks so much 🙂
It’s awesome!
Looks awesome!!! What a transformation! Did you think about painting the screws/hardware pieces holding the cabinet doors on the cabinet color to blend in?
Thanks! We did spray paint the hinges to match!
Lauren it looks amazing!!! What did you install for under cabinet lighting? Battery operated?? I didn’t see cords so I assumed battery.
Thanks so much and again… fabulous job!!
Thank you so much! Yes, they’re just battery operated lights.
Can I ask what type of floors you have and what color?
I don’t know anything about them — they were already like this when we purchased the house. Sorry!
Looks beautiful! We have the same countertops and love them too!!!
We remodeled oyr home almost 9yrs ago & now, I want to start another project, especially looking at your beautiful kitchen!
We have quartz countertops and love them! Your light fixtures are absolutely beautiful too.
Im so impressed you & your mom tackled most of the project of the backspash together. Nevee under estimate women.We can do anything. Except, I dont think I could tile. Lol!
Enjoy your new space.
Hi Lauren! Love the remodel!!
I believe in your insta stories you shared a screwdriver that was super helpful for this project. Can you share what that was? Hoping to purchase as a father’s day gift. Thanks so much!
Hi! It’s a DeWalt gyroscopic screwdriver – available on Amazon, Home Depot, etc.
Thanks so much! A huge fan of your blog.
love the knee wall and the canister set that sits onto each other! Love the subway tile, excellent makeover!
Thanks, Mary!
Hey Lauren! You have a beautiful and amazingly decorated kitchen! Loved it!